
Blog
Magento tutorial for beginners: Install, configure, and sell

Nov
Magento caters to ecommerce developers and enterprise merchants — an audience with advanced ecommerce needs. If you happen to’re a beginner, you’ll probably start off intimidated by the platform’s technical capabilities.
Nonetheless, you’ll discover that Magento is extensible, flexible, and user-friendly. That’s why top ecommerce brands like Marie Claire, Accent Group, and HP have adopted it.
Whether you are an ecommerce business owner, store manager, or developer, this Magento tutorial will equip you with the know-how to harness Magento’s fundamentals and features.
Here’s what you’ll learn:
The 2 sides of Magento
Magento offers two editions: Adobe Commerce and Magento Open Source.
Adobe Commerce is the premium version with advanced features, built-in cloud hosting, and enterprise-level support.
Magento Open Source is free and suitable for business owners needing independent data management and customization.
Magento Open Source has an lively developer community that’s continuously creating solutions. By installing Magento extensions, you possibly can replicate any utility that Adobe Commerce offers, including B2B features.
Step-by-step Magento installation guide
This wouldn’t be a Magento tutorial without an summary of the installation process. Take into account that installation steps will vary depending in your server environment and the version of Magento you’ve. It’s essential to have developer knowledge before organising Magento.
Prepare your foundation
Double-check that your system can handle Magento’s minimum requirements:
- Web servers (Apache or NGINX).
- PHP staff.
- Supported database servers (MySQL or MariaDB).
- Other dependencies (Elasticsearch, OpenSearch, and Composer).
Whenever you’ve accomplished these steps, create a Magento installation database using command-line tools or your database server’s administration panel.
Configure and install Magento
Extract the installation package to your web server’s root directory or subdirectory. Use the next steps to configure Magento.
- Open an internet browser and enter your Magento installation URL. This can trigger an install wizard.
- Select your chosen language, then read and accept the terms and conditions.
- Magento will confirm dependencies and server compatibility. Resolve any issues.
- Enter your database details, including hostname, database name, username, and password.
- Arrange your store’s URL and admin path.
- Set your time zone, currency, and language.
- Create an admin account.
Review the summary of your settings and initiate the installation. When the method is complete, log in with the admin details you created.
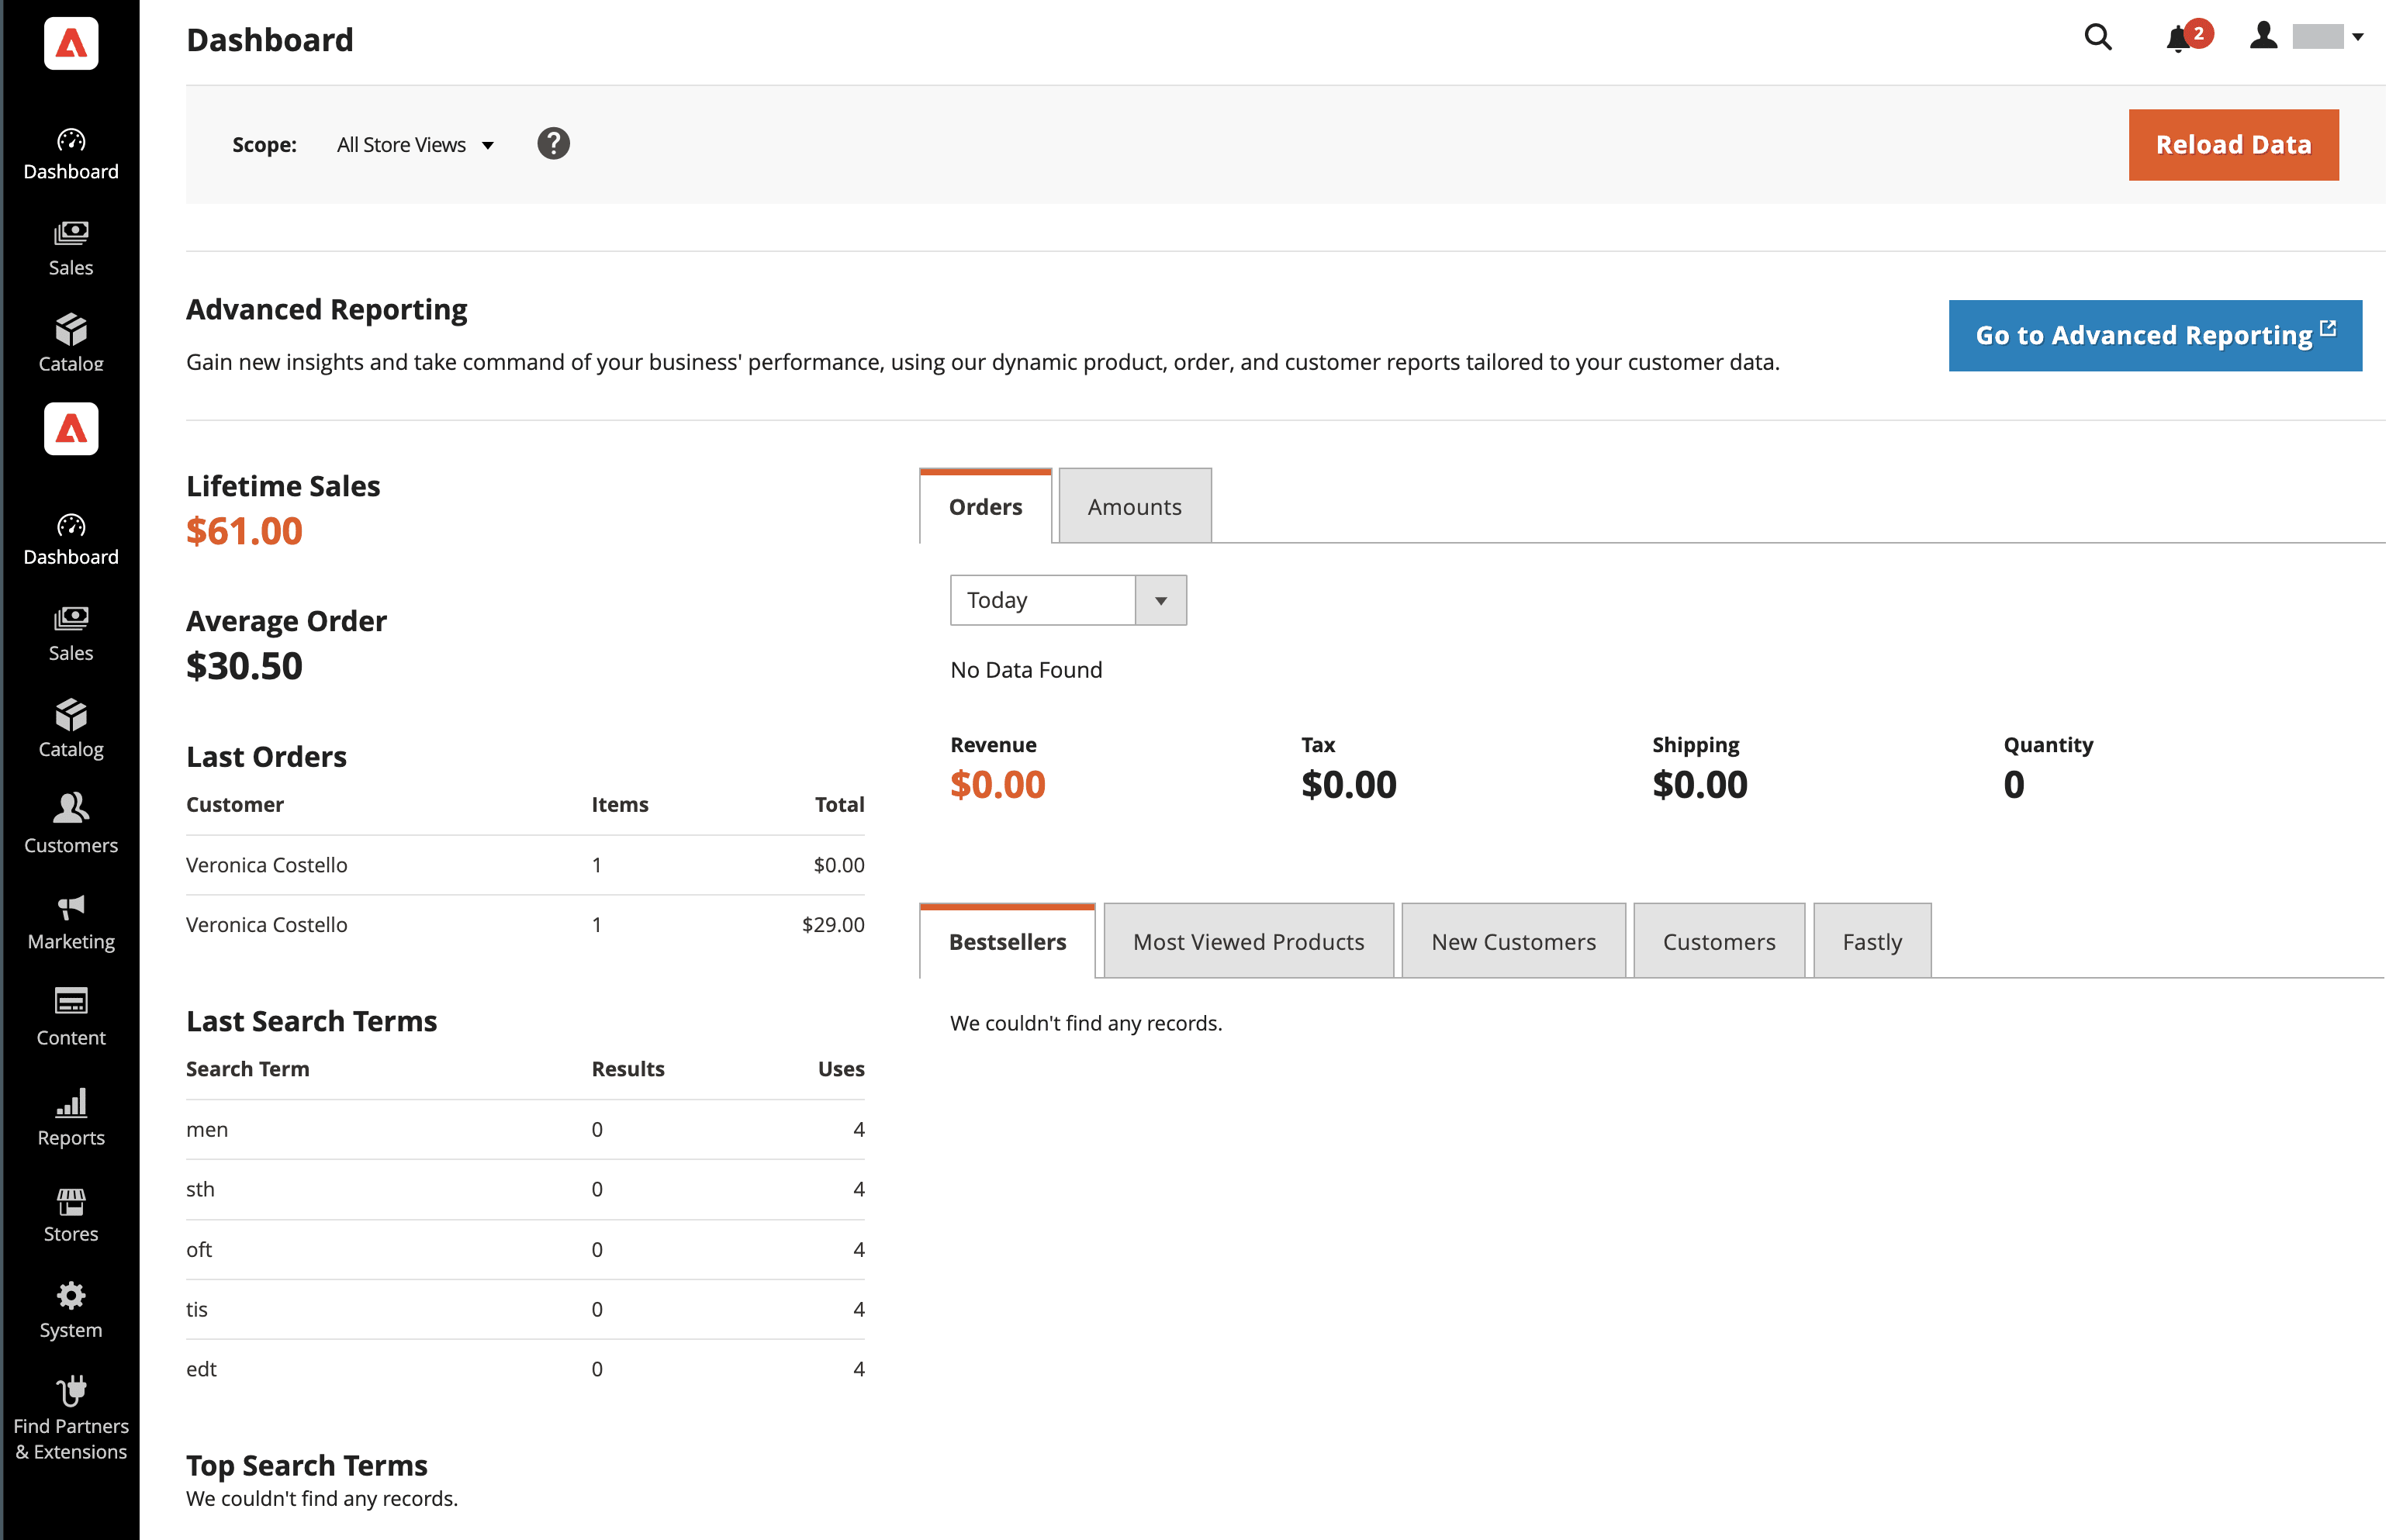
Magento tutorial: Navigating the admin panel
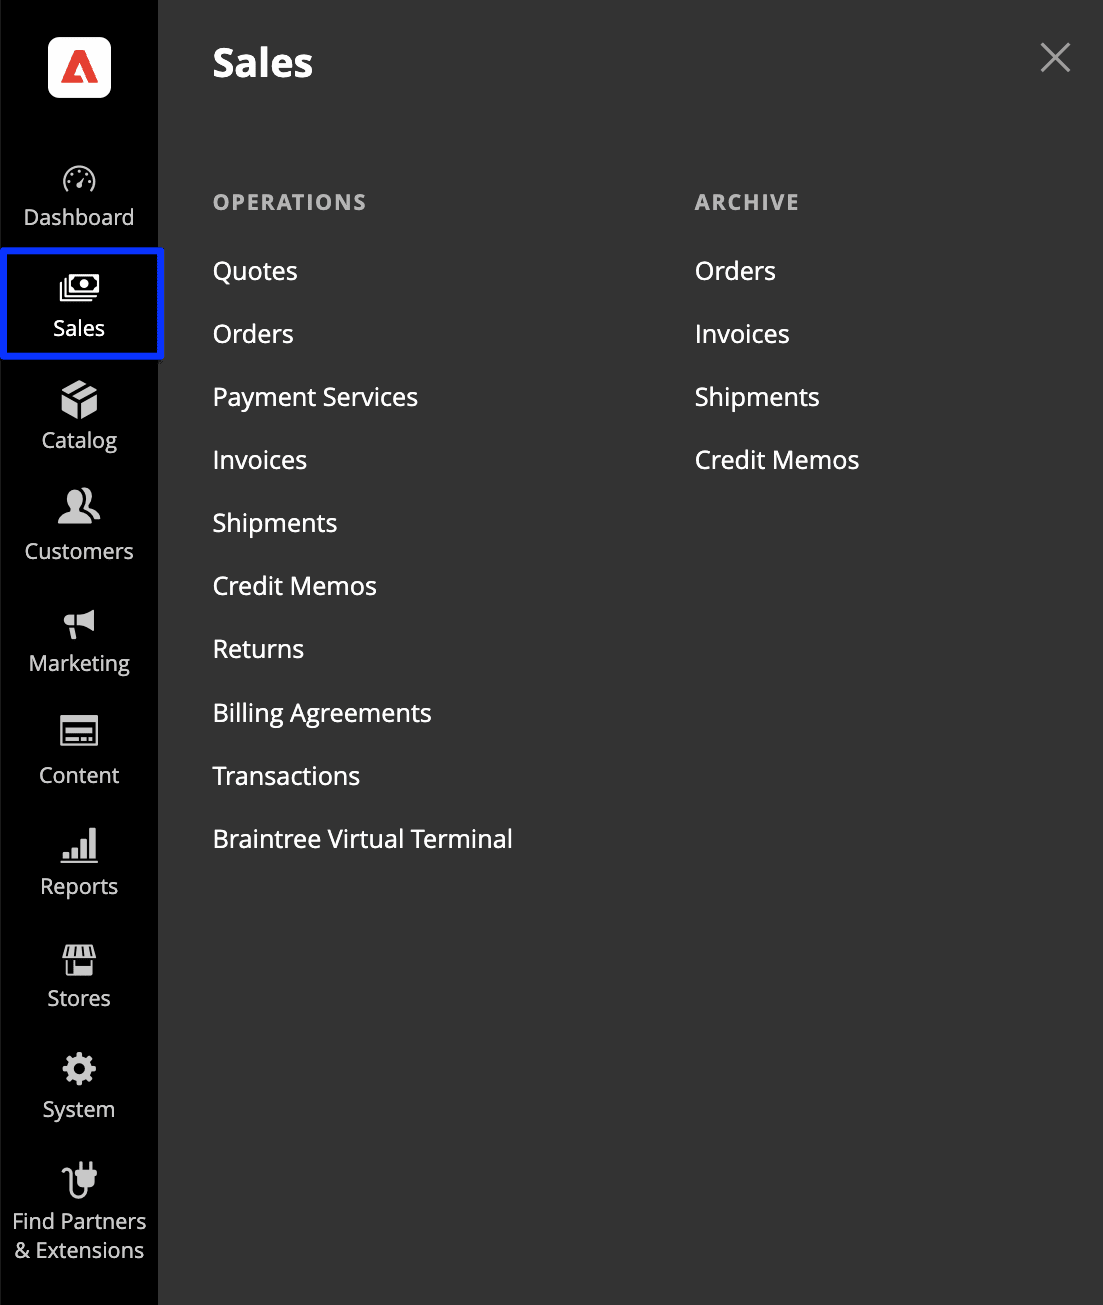
The Magento admin panel is a password-protected back office. Merchants use it for a big selection of tasks, reminiscent of organising products, managing orders, and reviewing reports. The admin panel features 10 sections:
- Dashboard.
- Sales.
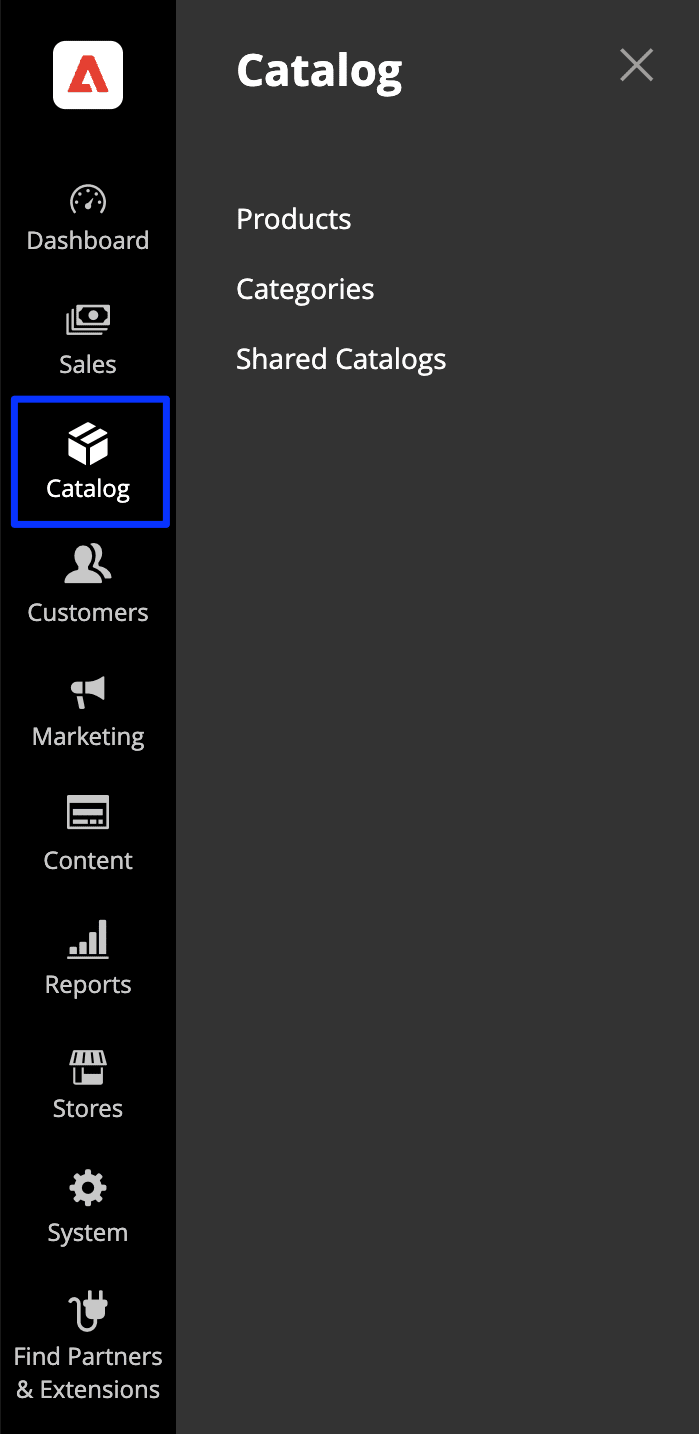
- Catalog.
- Customers.
- Marketing.
- Content.
- Reports.
- Stores.
- System.
- Find partners and extensions.
Throughout this Magento tutorial, you’ll learn concerning the sections. First things first, the dashboard provides an summary of your store’s performance.
The system section permits you to handle high-level admin tasks like permissions, data transfers, system resource management, extensions, and integrations.

Let’s explore permissions and data transfers since they’ll shape your store’s setup and operation.
User permissions and admin management
Your Magento setup comes with login credentials for the administrator role, which has full permissions. Note you can limit a user’s permissions based on their role or tasks they should perform.
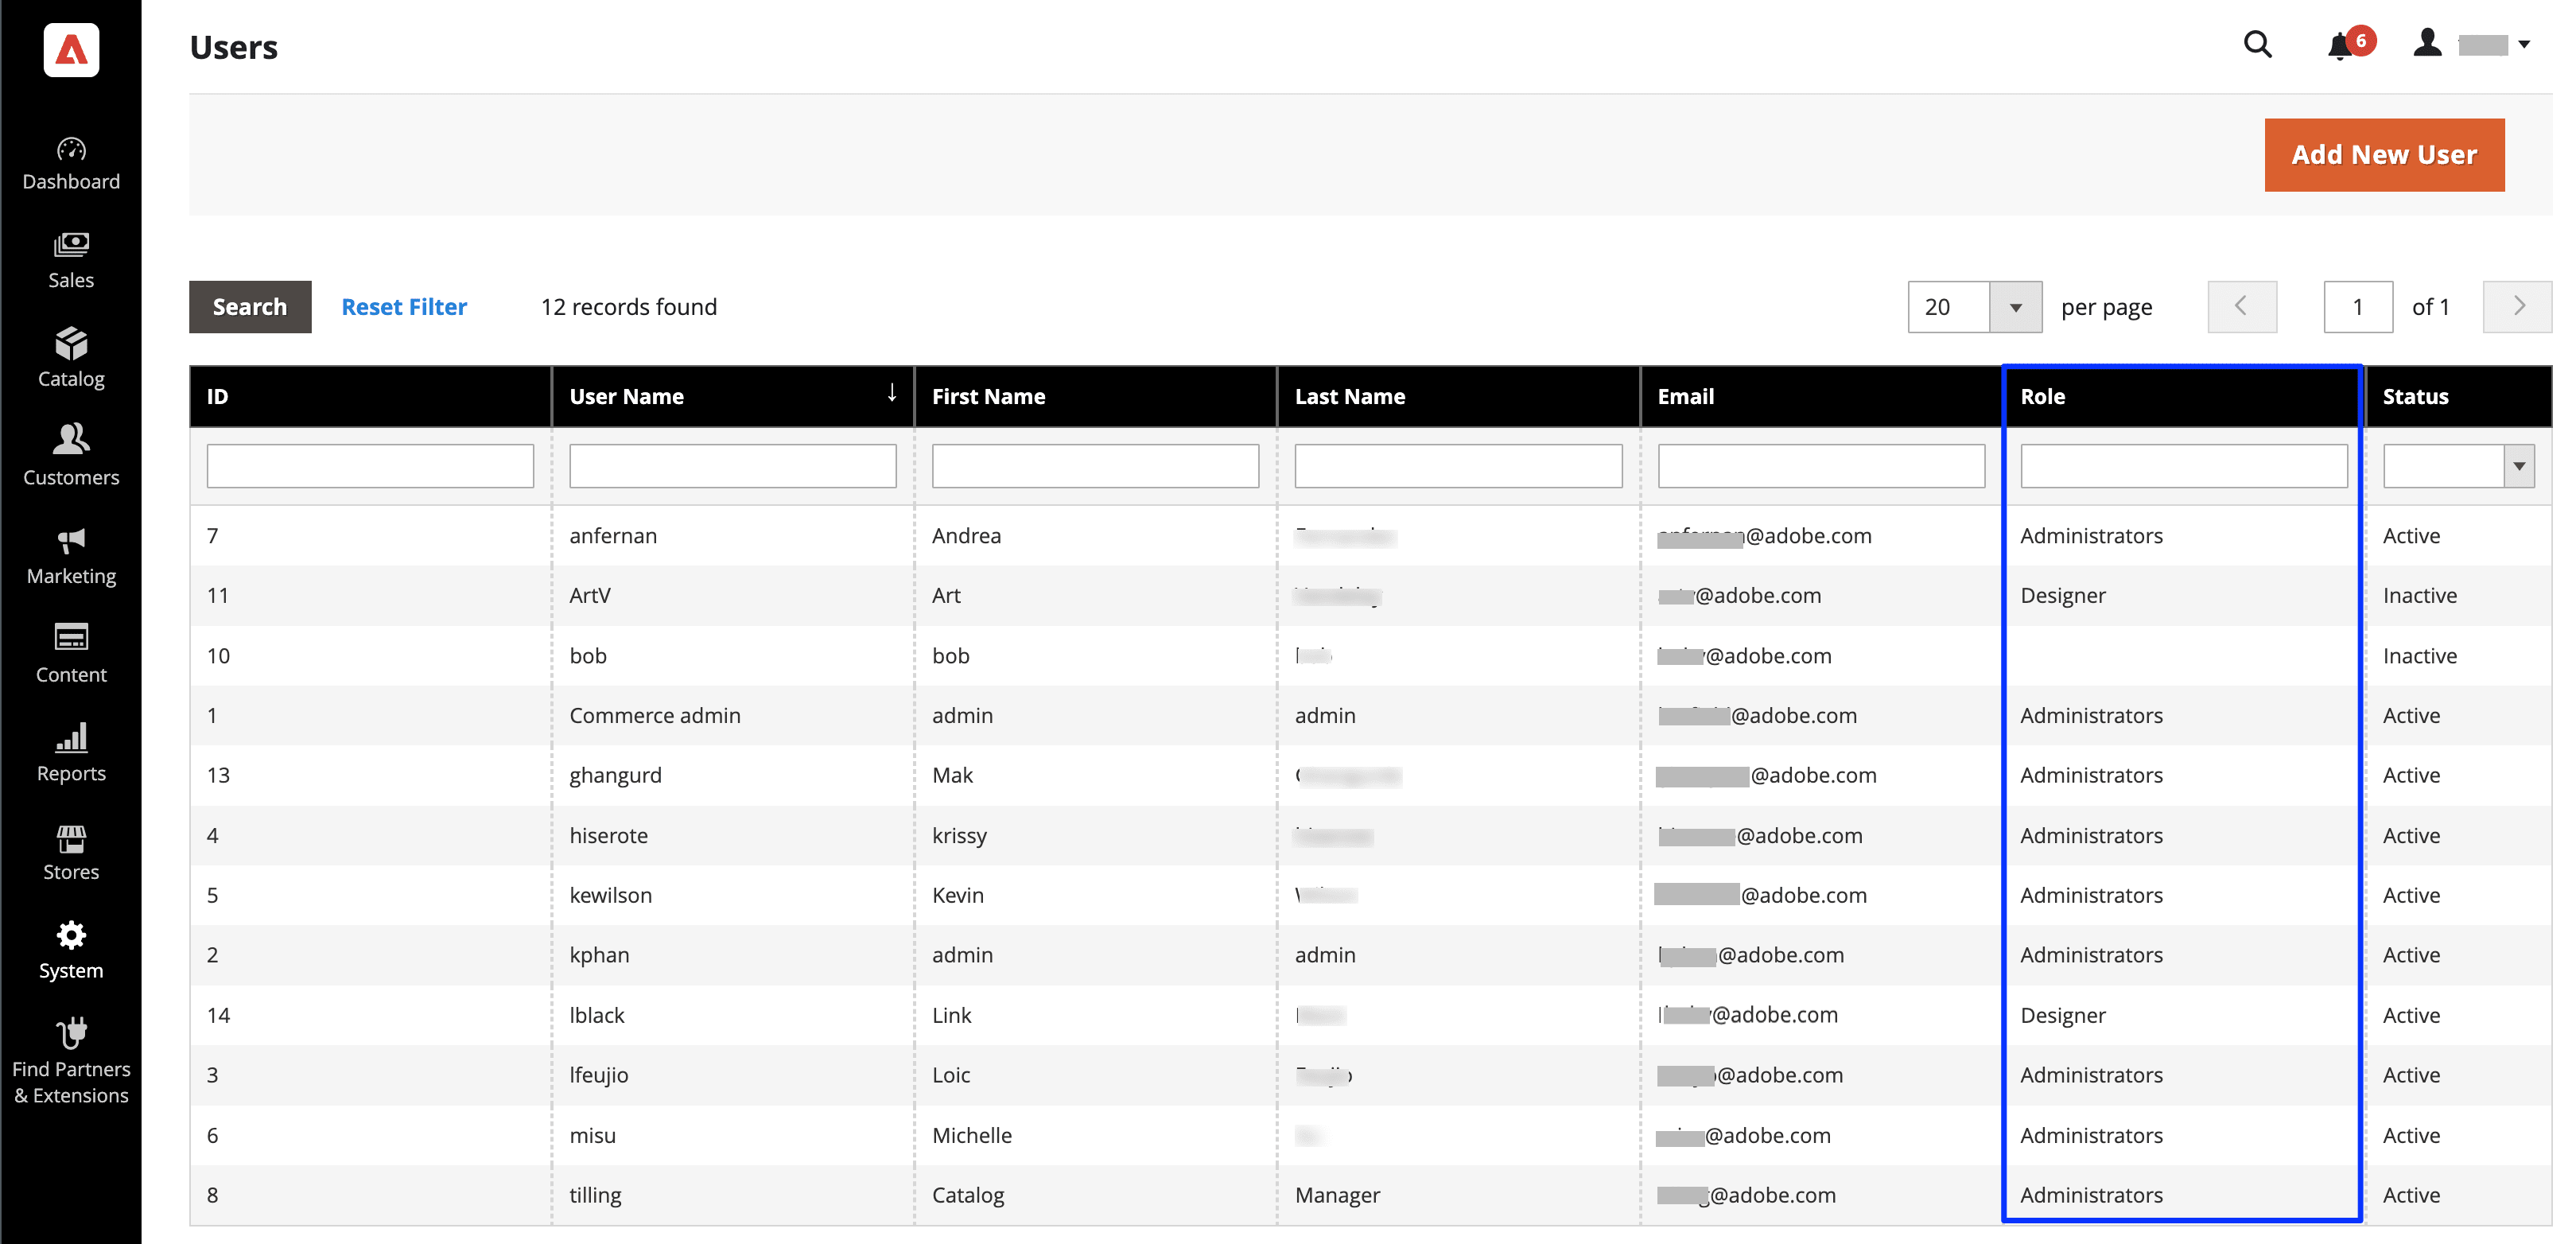
You select which sections and data to limit for whom.
Data transfer
The information import and export tools show you how to manage large product catalogs.
If you ought to change the attributes of multiple products, you possibly can export data in bulk, edit it in a spreadsheet, and import it back to your store. That way, you need to use the time-saving functions of a spreadsheet program.

These admin panel sections control the back end of store management with Magento. How about some sections for creating your store’s front end?
Magento store setup and configuration
Store owners, admins, and developers can use this Magento tutorial to know the modules, extensions, content, and themes which might be needed to administer a store efficiently.
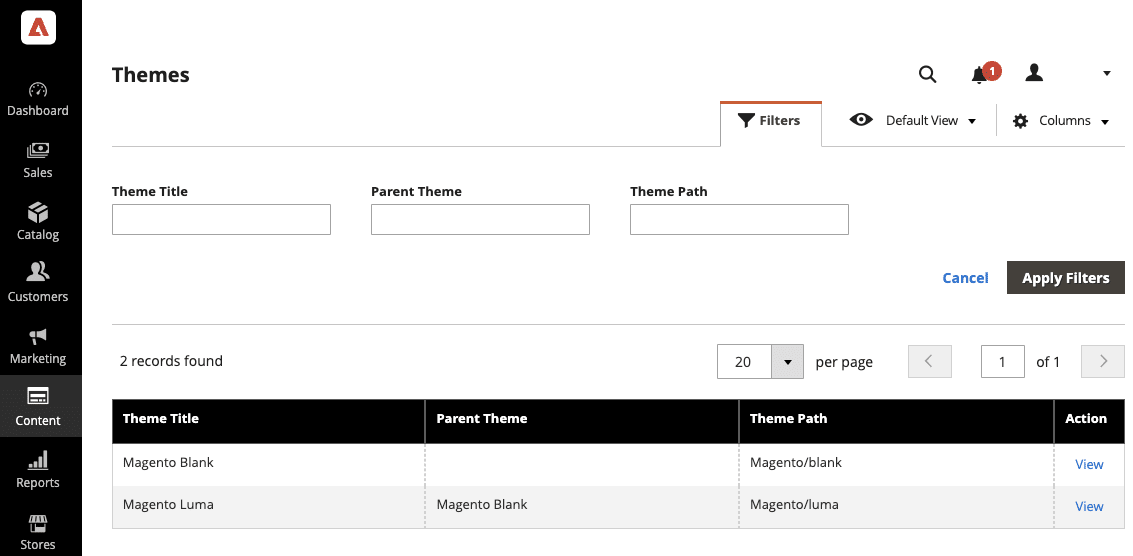
Magento themes vs modules vs extensions
Beginners often wonder concerning the difference between Magento’s themes, modules, and extensions. Each allows customization, and you possibly can install, delete, or disable them.
Modules are native to Magento’s core. They’re directories containing code for specific business features, providing standalone or expanded functionalities. Alternatively, extensions are like modules from third-party developers — you’ll have to seek them out to boost Magento’s functionality.
Similarly, themes are add-ons, but they center on altering the looks and user experience, whereas modules and extensions often handle business features.
The basics of Magento store design
There are three key elements of store design with Magento: Themes, content staging, and multi-stores.
Themes are pre-designed templates that determine the visual appearance of a store. They’re often customizable.
When you’ve downloaded a theme, you possibly can access it within the content section of the admin panel.
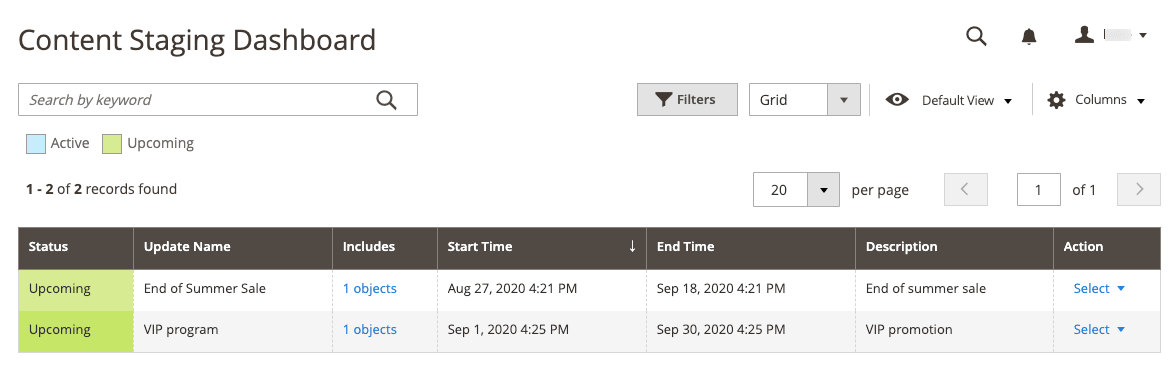
Before you alter your website’s content or design, arrange content staging. With content staging, you possibly can preview store changes before they go live. You may even schedule the changes, ensuring a seamless customer experience.
The content staging dashboard displays an update’s status, start and end times, and task descriptions.
Now you can use content staging, you’re able to make some content.
The way to create content pages in Magento
Content pages are essential for making a dynamic online store that draws and retains customers.
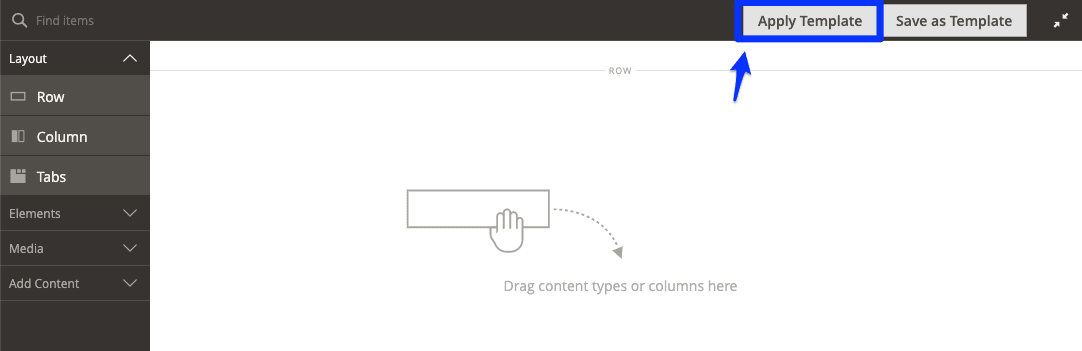
You may create custom content templates for layouts and page attributes or use existing templates. Add HTML, CSS, and JavaScript codes to your template files, customizing them to match your branding and design.
Enhance your page’s visual appeal using the media directory so as to add images, videos, and more. You may reference media files in your content pages using the suitable HTML tags.
Use blocks so as to add dynamic content reminiscent of product listings or promotional banners.
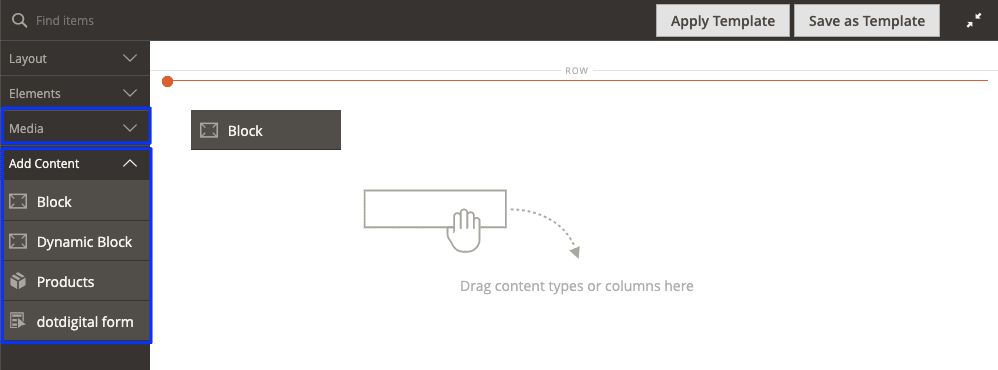
Developers can define content blocks within the admin panel or with XML files. Within the CMS page editor, insert these blocks into your content pages by referencing their identifiers.
As you construct out the pages of your online store, here’s the way to enable tracking so you possibly can stay informed by analytics.
The way to enable tracking and analytics
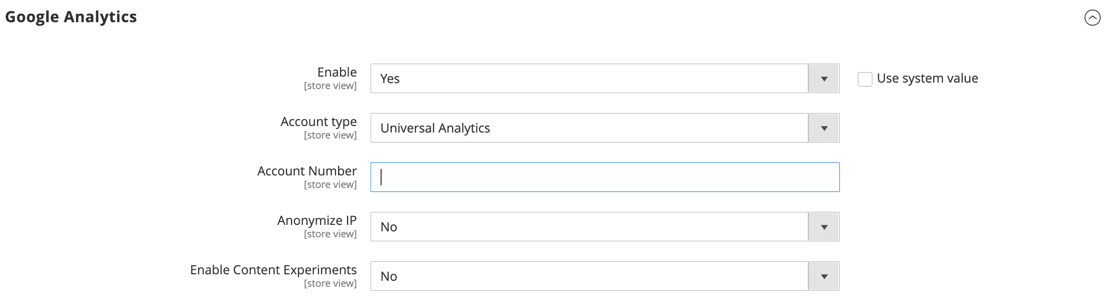
This Magento tutorial will cover integrating Google services, particularly Google Analytics and Google Tag Manager. These integrations enable Magento store tracking and analytics.
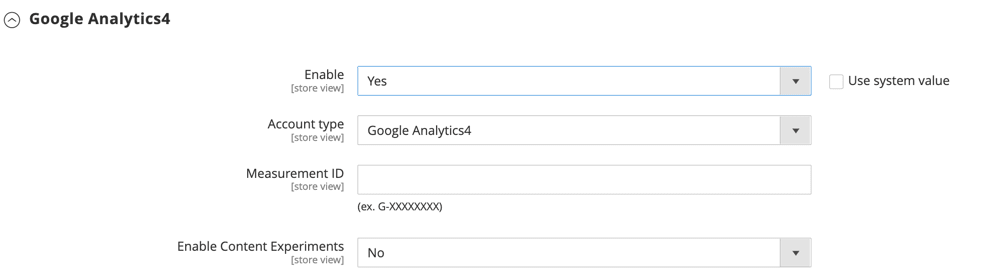
To permit Google Analytics, go to the Magento admin panel. Navigate to Stores > Configuration > Sales > Google API. Enter your Google Analytics tracking ID, enable the feature, and save.
Google services integrate with global site tags (gtag.js) for the reason that release of Magento 2.4.5. Global site tags are compatible with all Google platforms, which suggests you possibly can perform advanced tracking across different tools.
Next, arrange a Google Tag Manager extension. Once installed, enter your Google Tag Manager ID within the settings, then put it aside. With Google Tag Manager, you possibly can easily sort and process your store’s performance data and send it to any JavaScript-based tracking tool.
Project management in Magento
Once you’ve your online store, you’ll want to arrange and optimize products since that improves sales and customer experience.
Inventory management
Admins can manage inventory in two ways: The admin panel and the command-line interface (CLI).
You may manage the next things, for starters:
- Inventory sources and stocks.
- Source selection and reservations.
- Order and reservation status.
- Product types.
Here’s a sample scenario: An electrical scooter merchant sources inventory from two warehouses and a partner.
The merchant’s U.S. website and Amazon marketplace use combined stock from their Florida warehouse and the partner. Nonetheless, the Toronto warehouse supplies their Canadian website and stores with help from the partner warehouse.
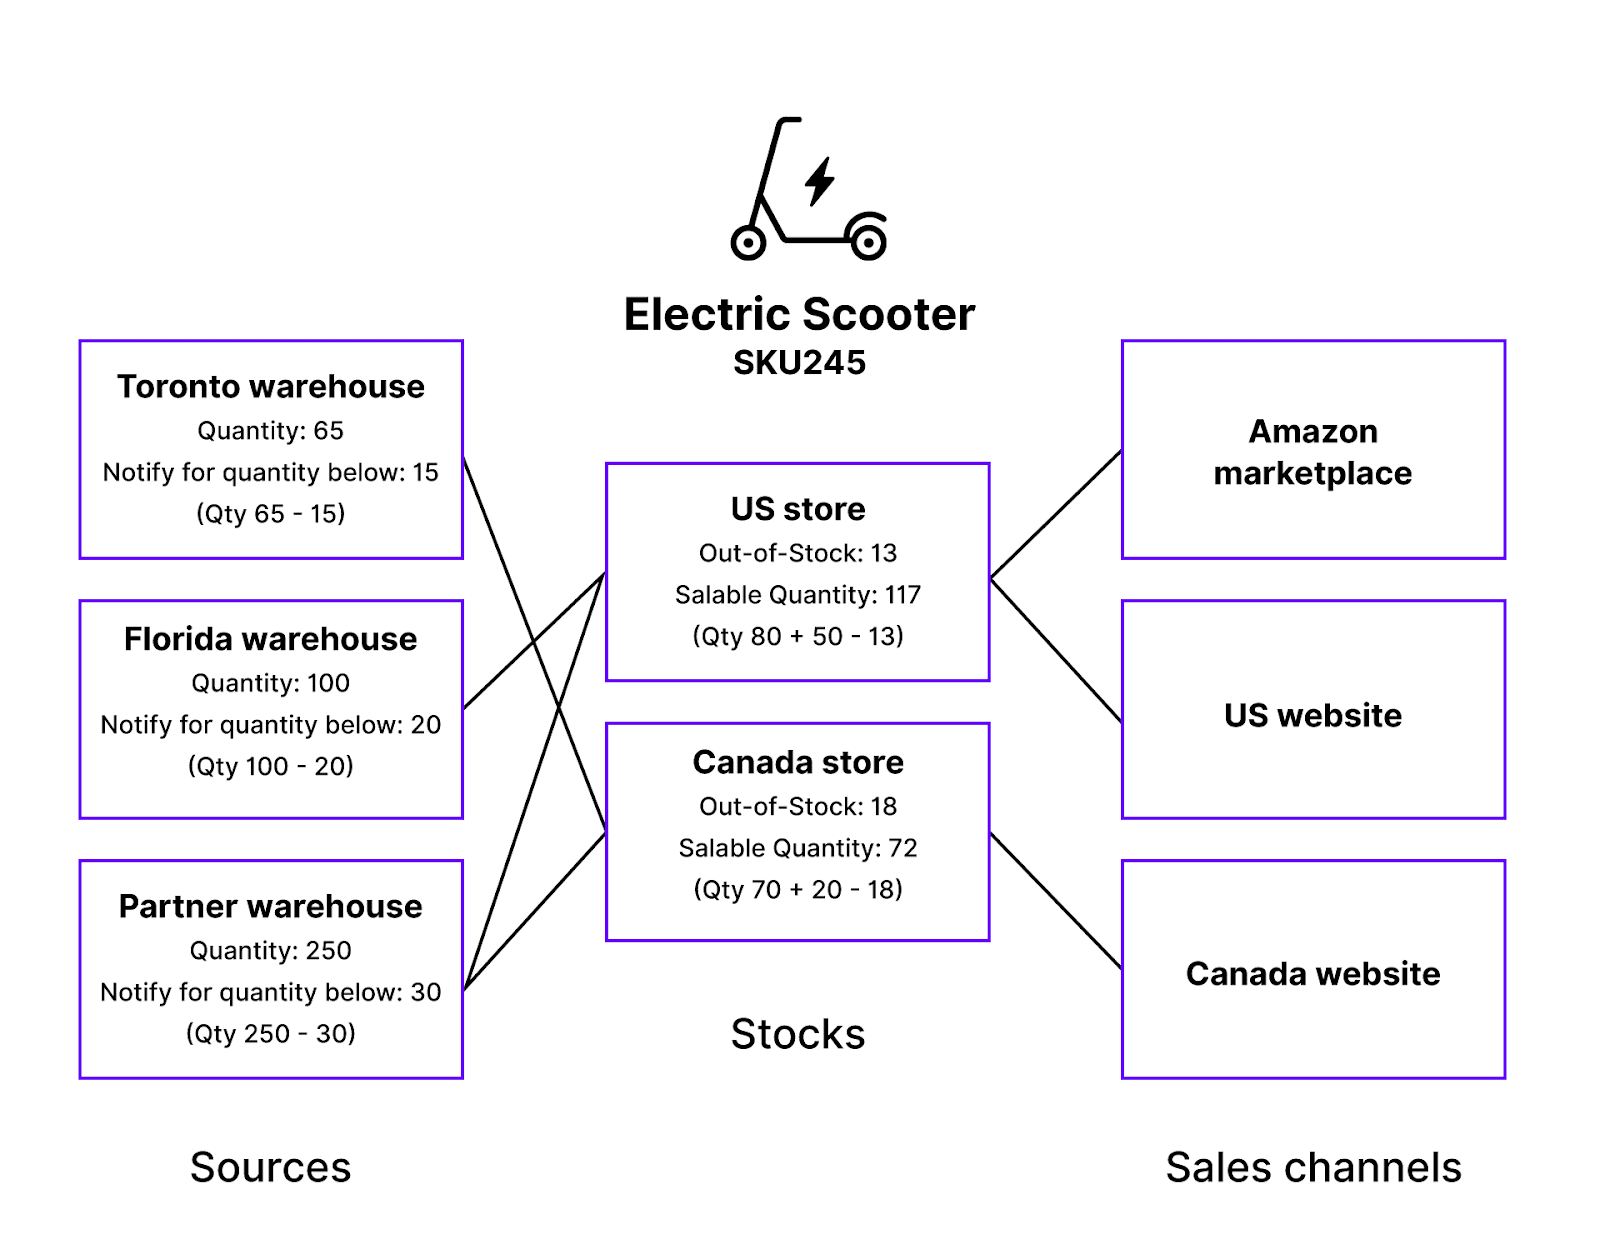
This example can get complicated, especially with multiple storefronts, distinct inventories to trace, and the necessity to manage out-of-stock products in several places.
Rest assured that Magento has the tools to trace and manage this complex situation and others that may arise for online stores.
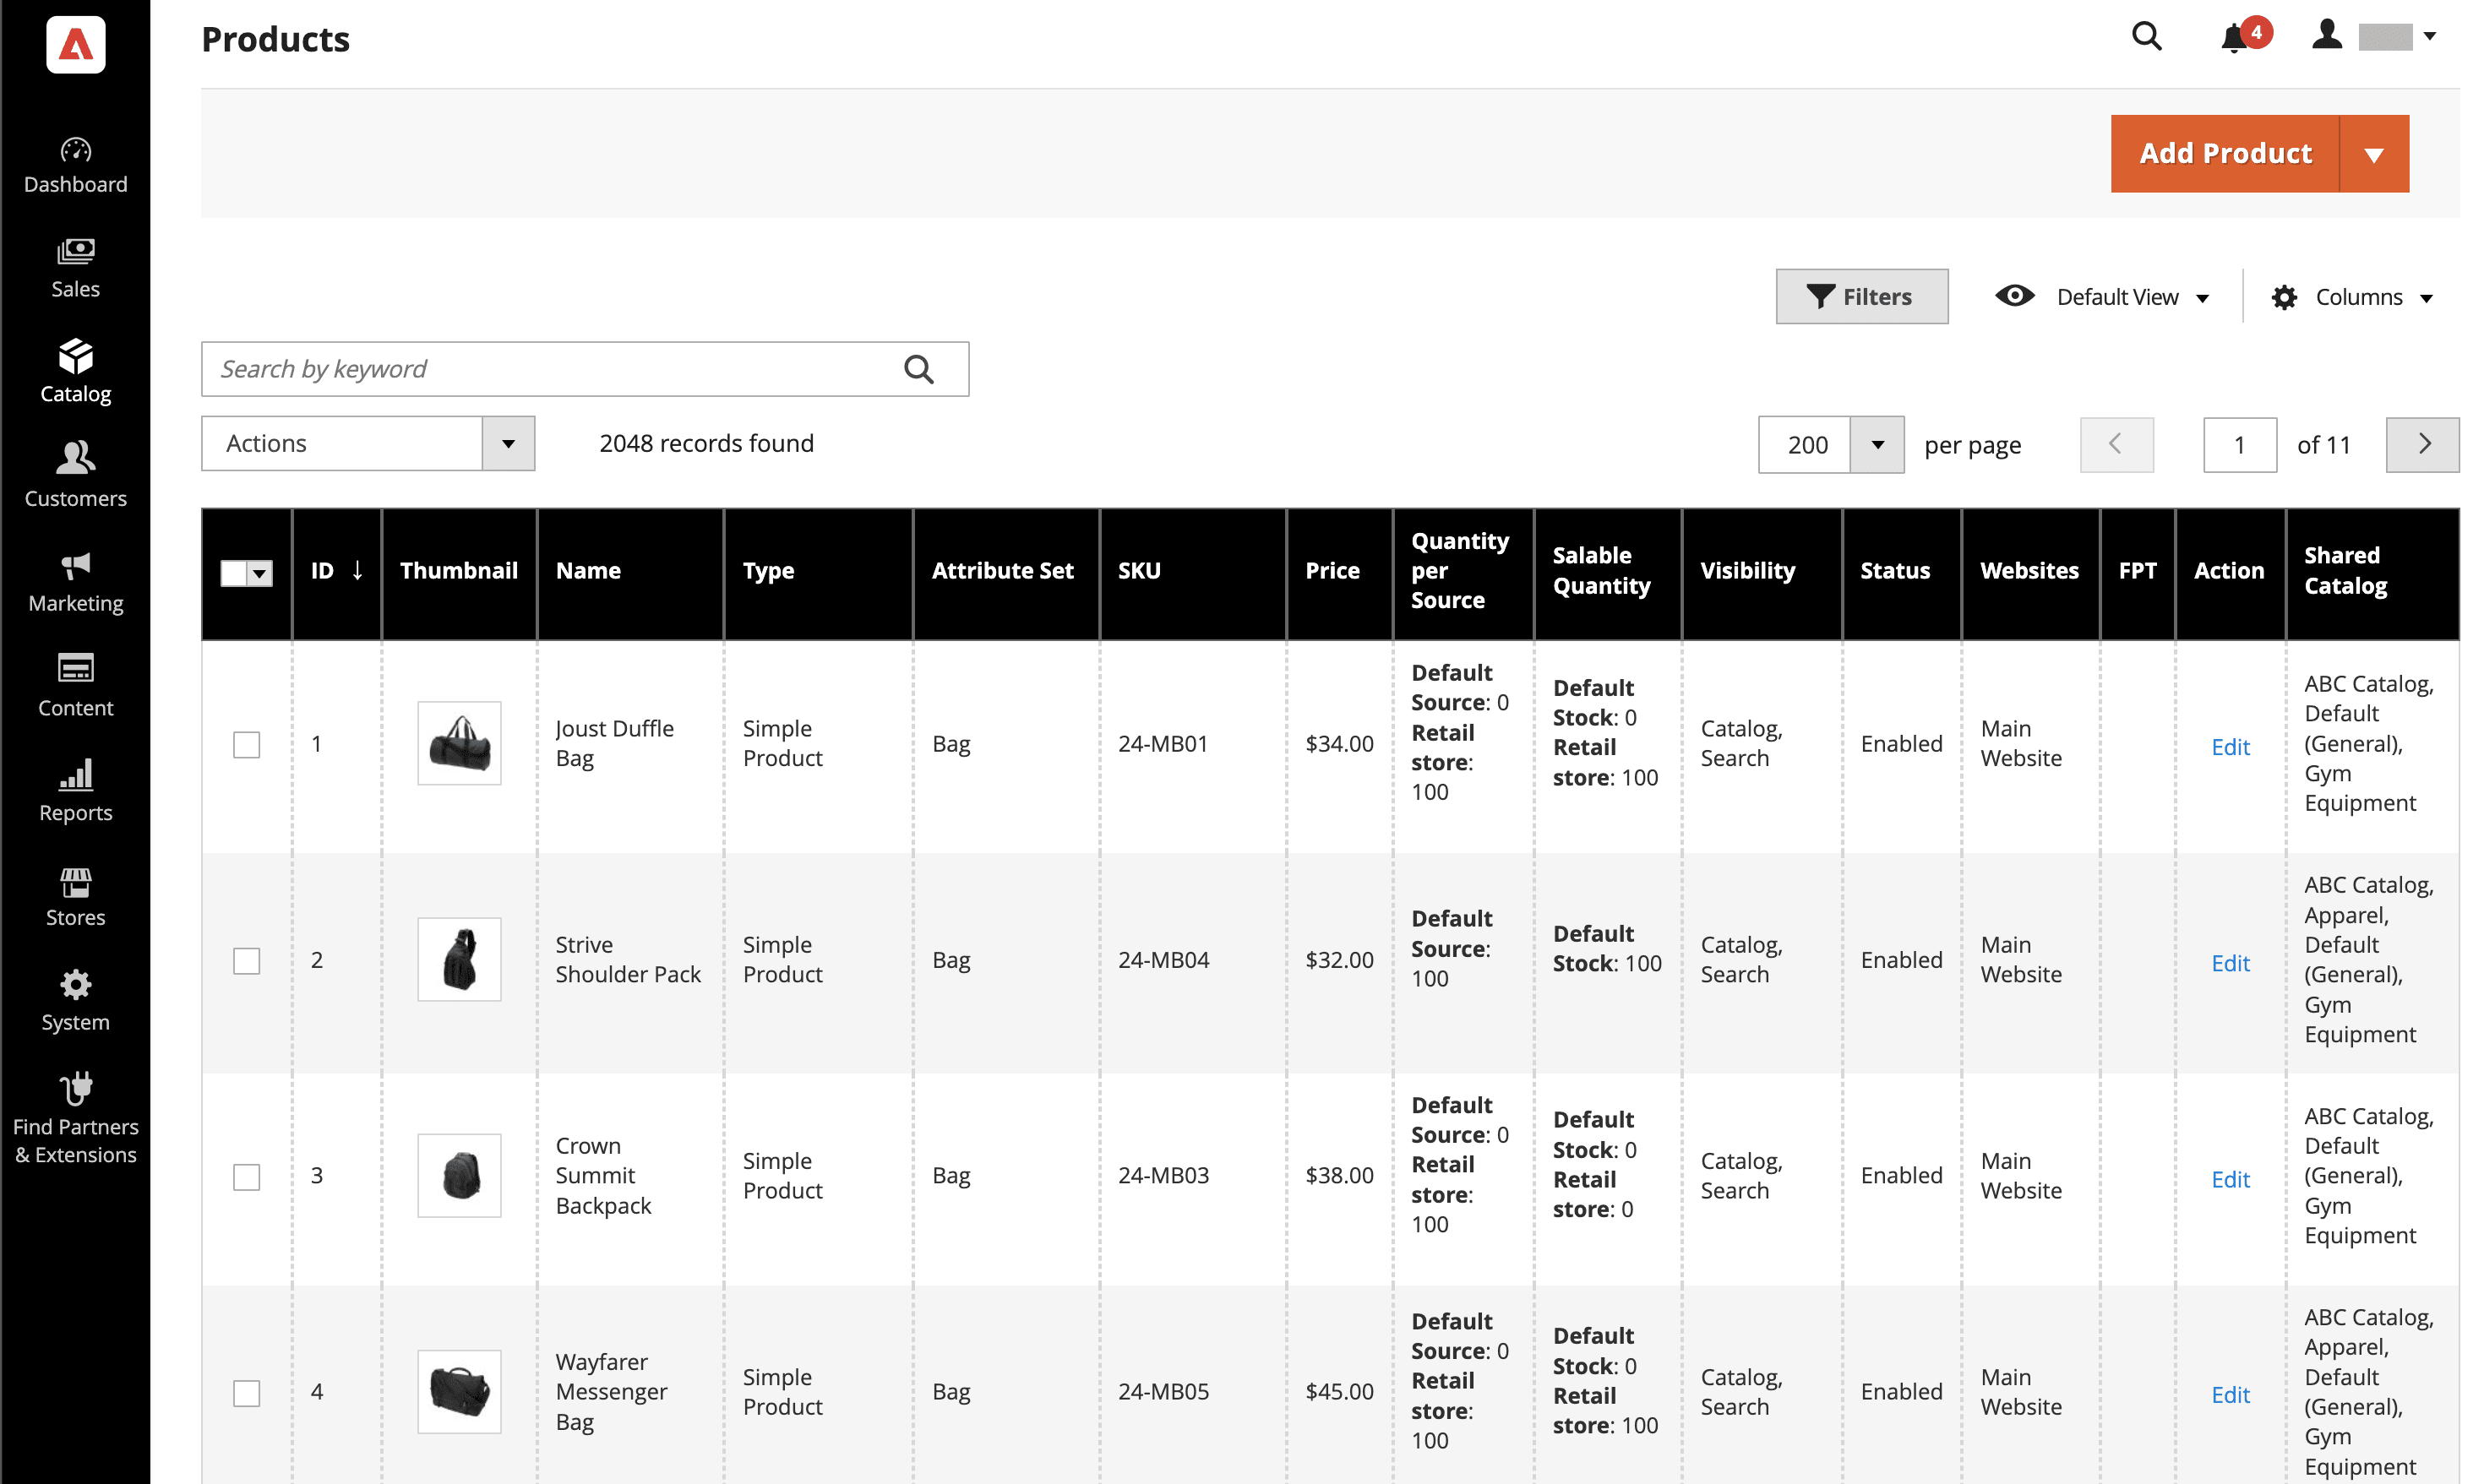
Catalog and category management
Magento’s catalogs will function your product database. Access your catalogs from the admin panel.
First, create some categories to sort your products into. This structure forms the muse of your store’s navigation. You can too manually manage catalog navigation and configure catalog search.
Set your catalog’s dynamic and static URL structure, which is crucial for increased visibility on search engines like google.
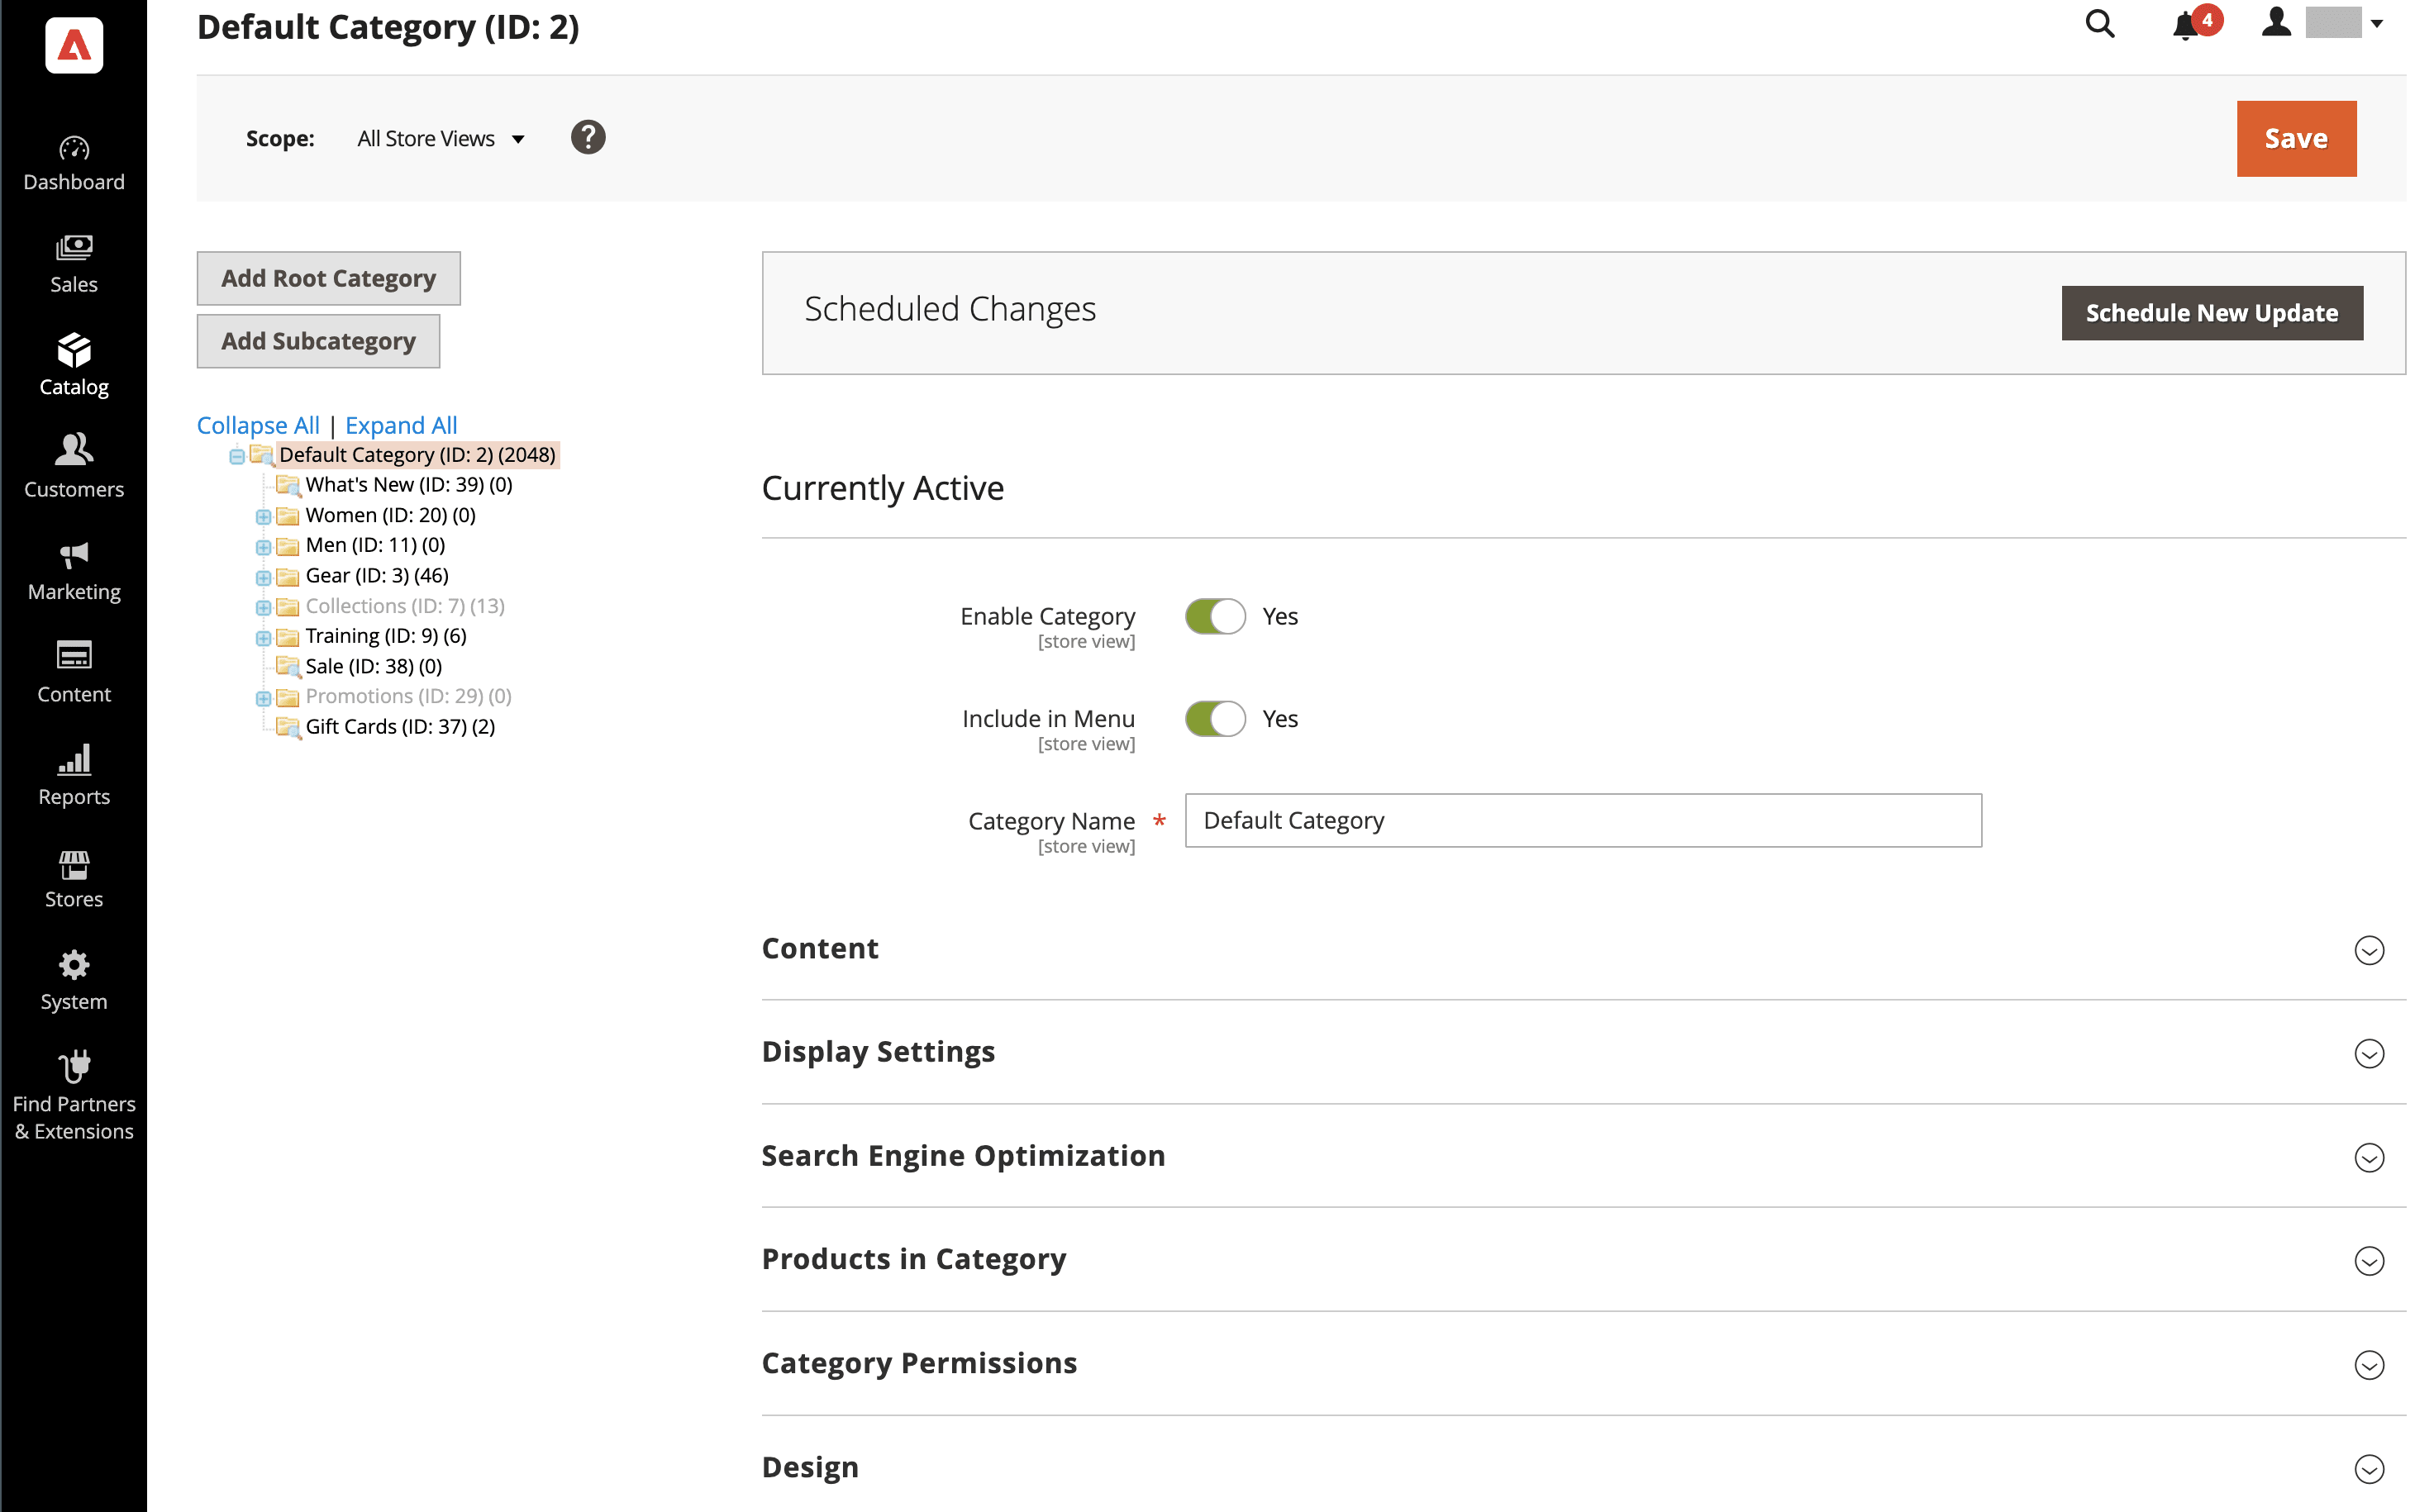
Within the products area of the catalogs section, add some products and include attributes to sort them by. You may all the time return here to create product lists and manage your inventory.
Similar to you possibly can organize your products, you possibly can do the identical along with your customers.
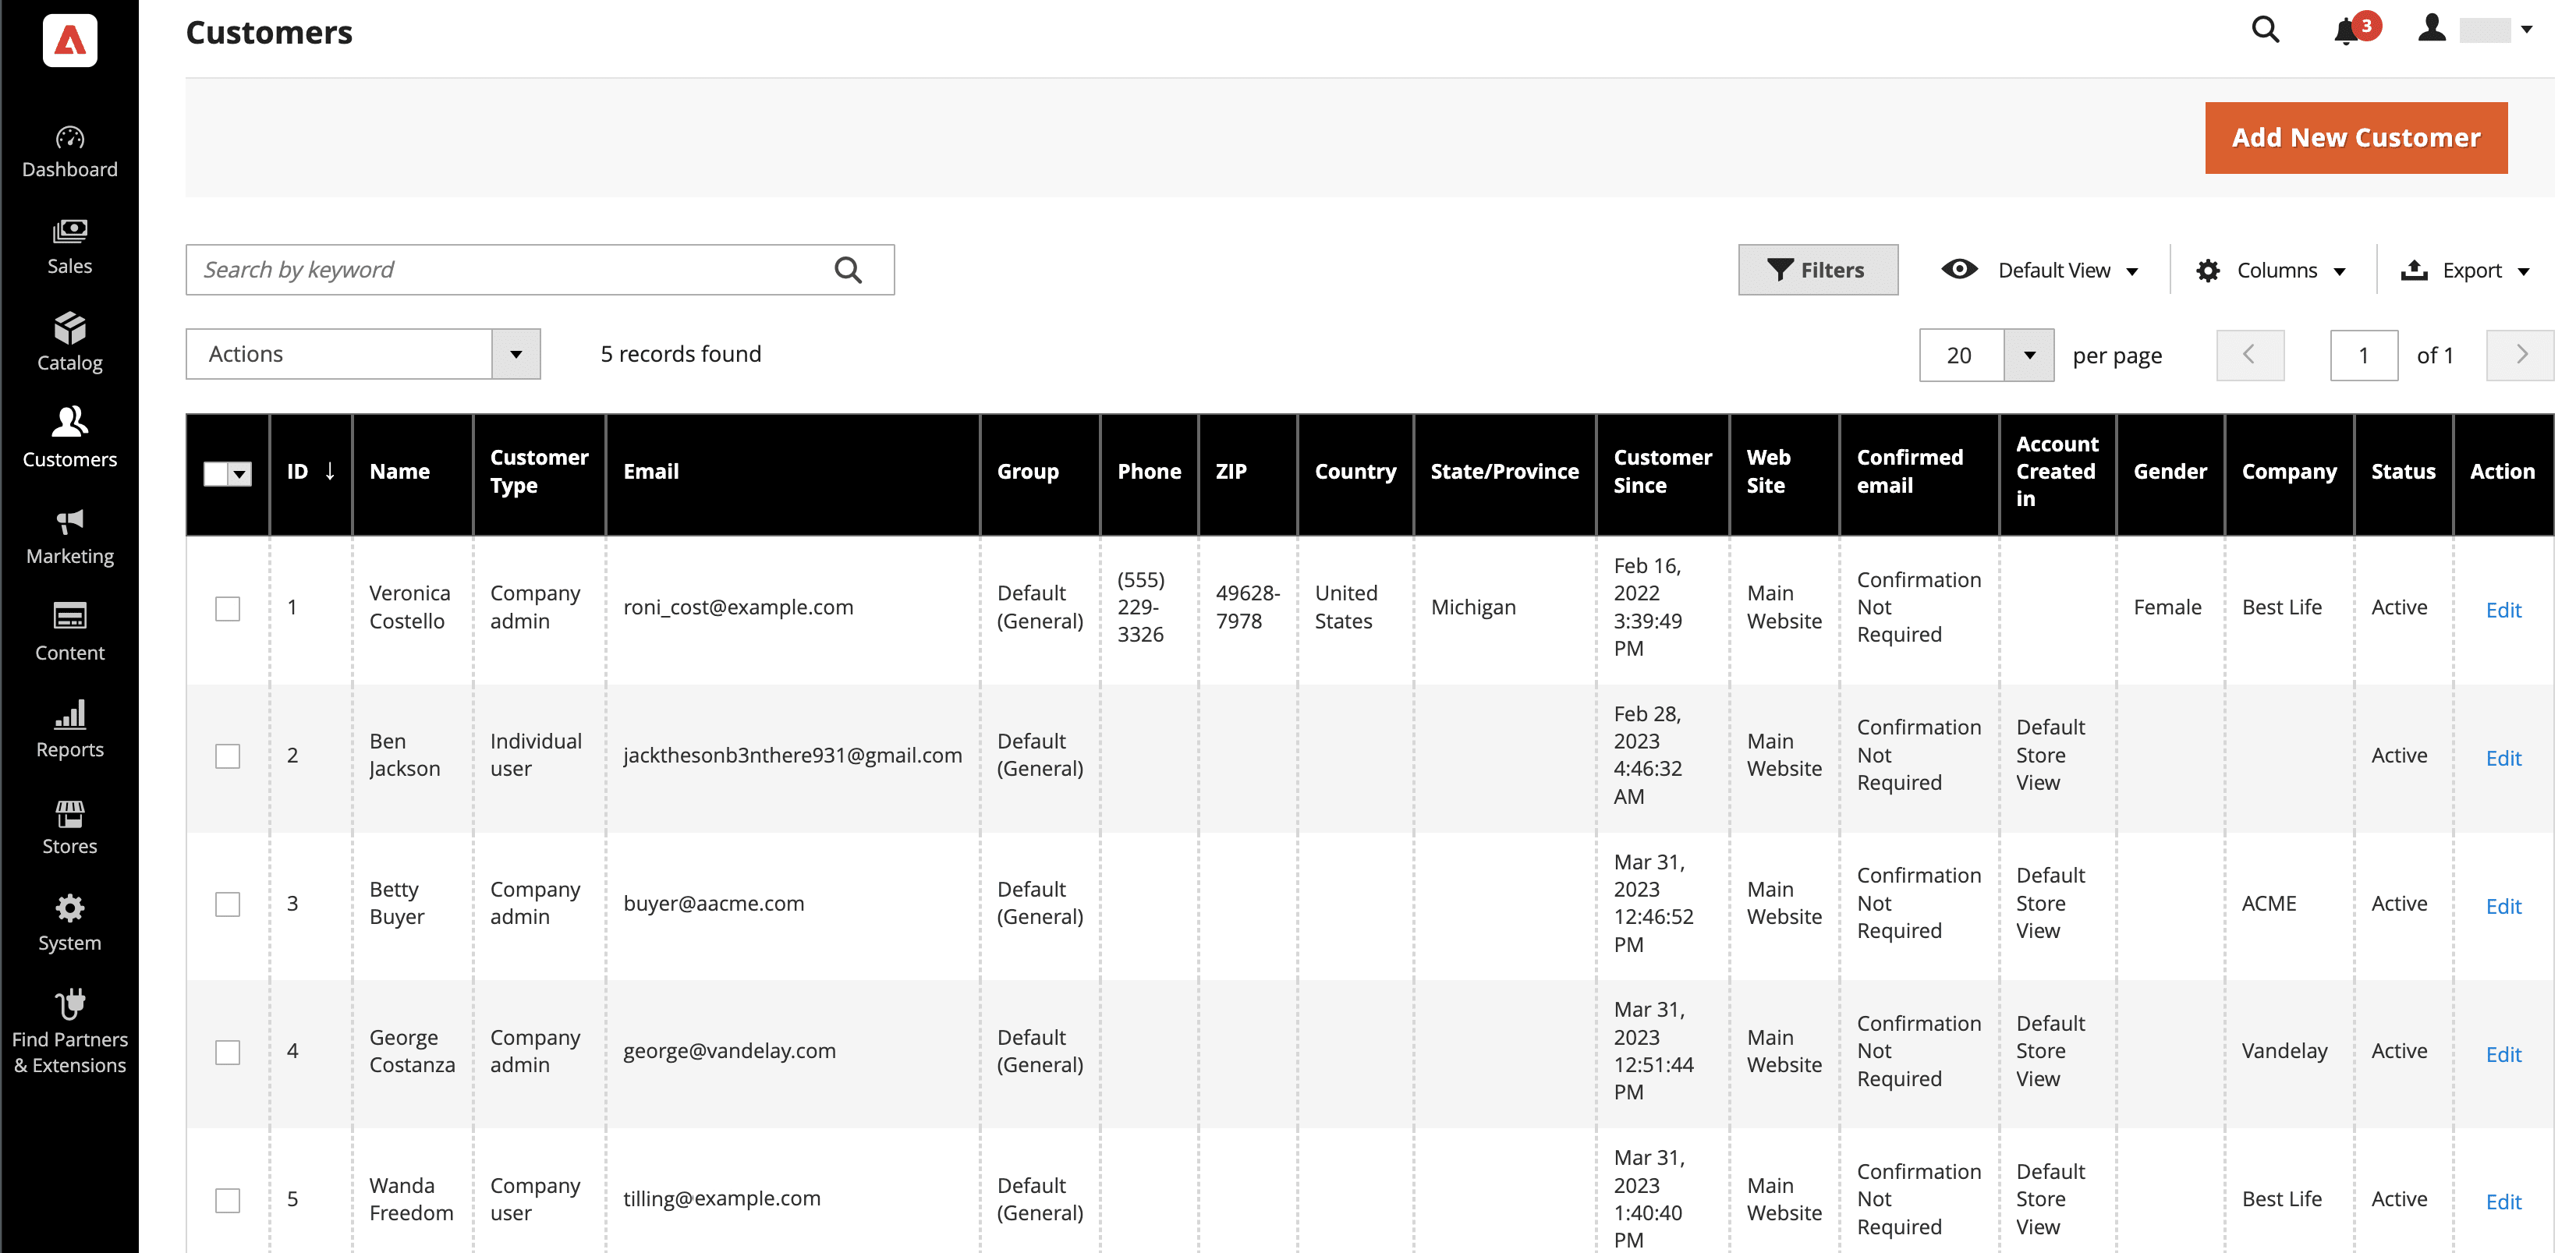
Customer management in Magento
After this Magento tutorial, you’ll understand the way to organize customers into different segments and groups and provides every one a customized experience. It revolves around customer lists, which should include each buyer’s details, reminiscent of name, contact info, and company.
A customer segment is predicated on specific attributes and behaviors, reminiscent of demographics and buy history. Businesses typically create segments to run targeted marketing campaigns. A segment is dynamic, meaning buyers are robotically added and removed based on the conditions.
Alternatively, customer groups are static and hand-picked by you or your staff. For instance, you possibly can create a bunch of wholesale customers and enable discounts for them — retail customers won’t have access.
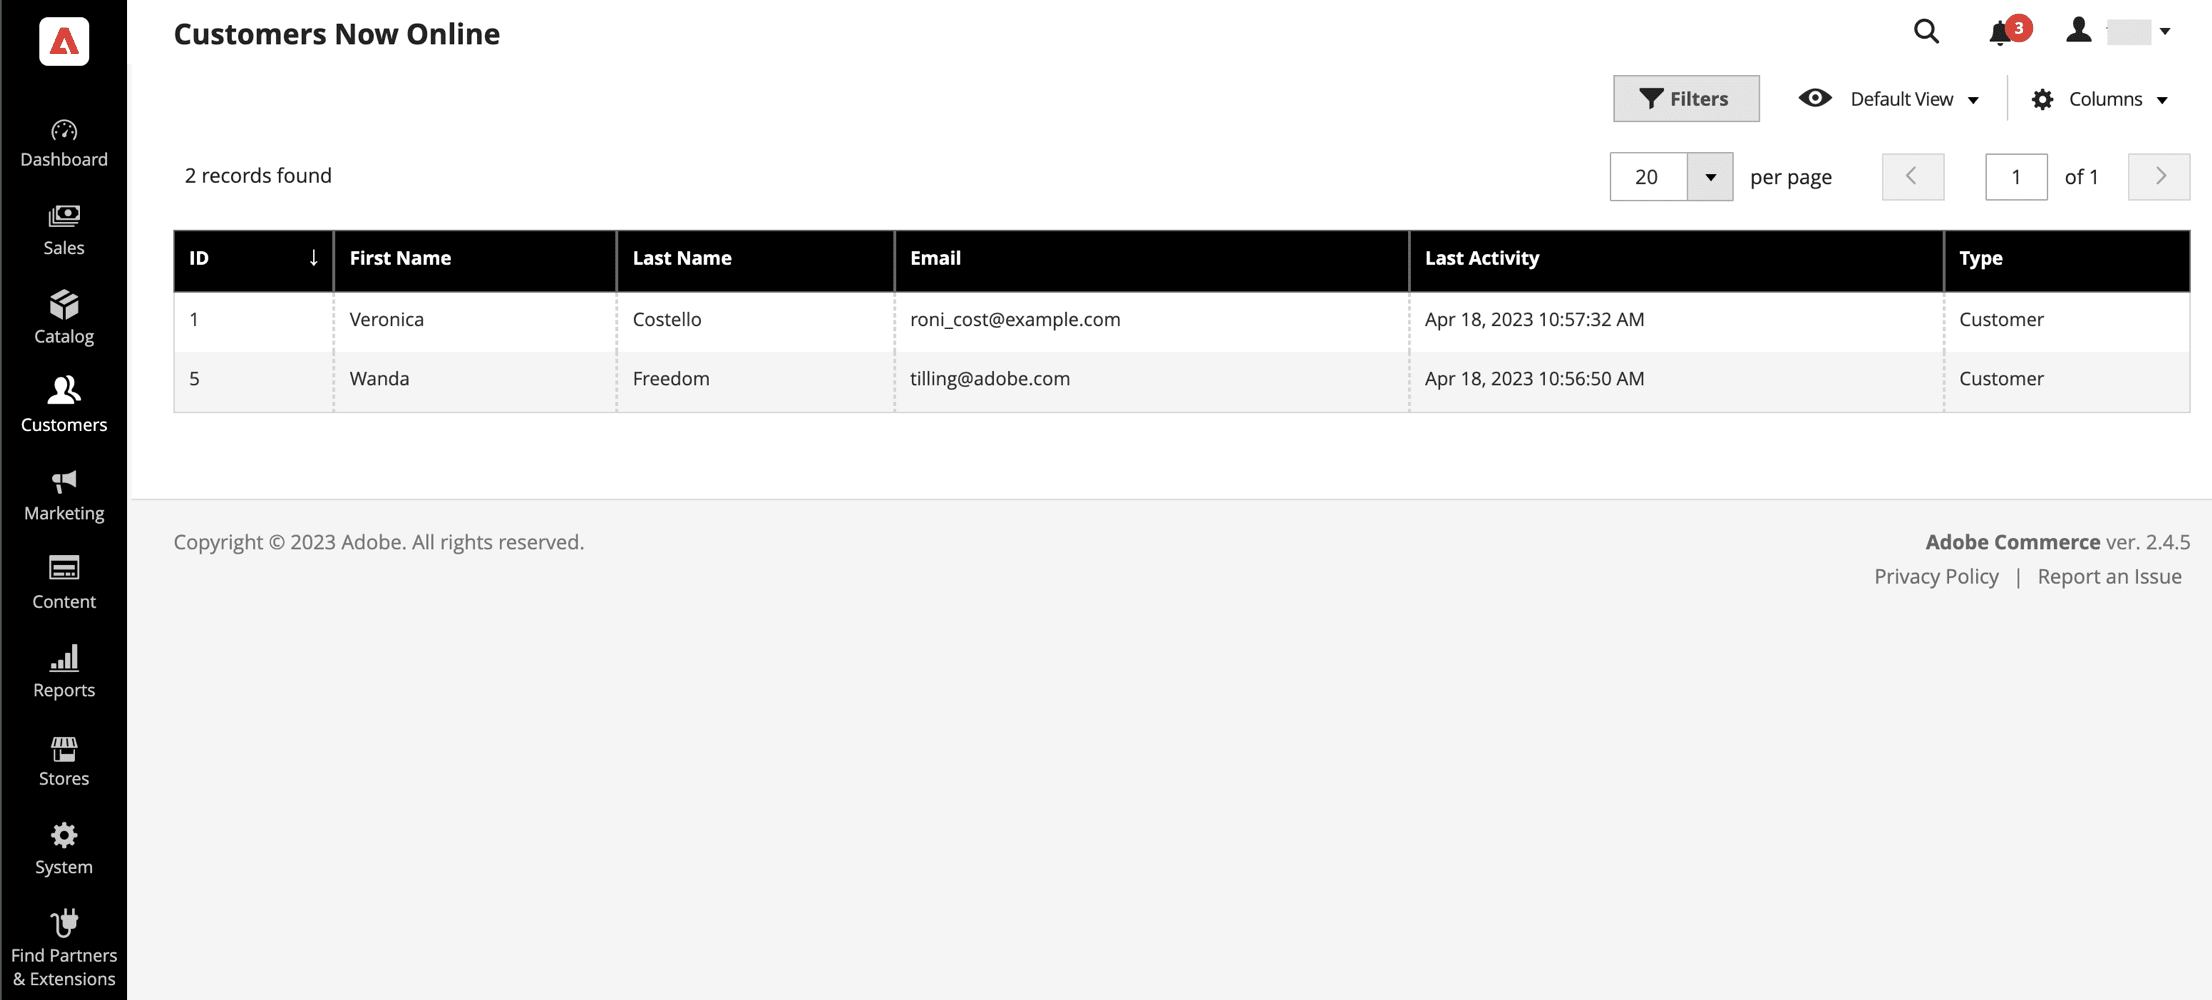
As well as, Magento shows you customers who’re currently shopping in your online store so you can goal them with relevant promotions and offers.
You may access an entire list of registered customers and see their communication and engagement.
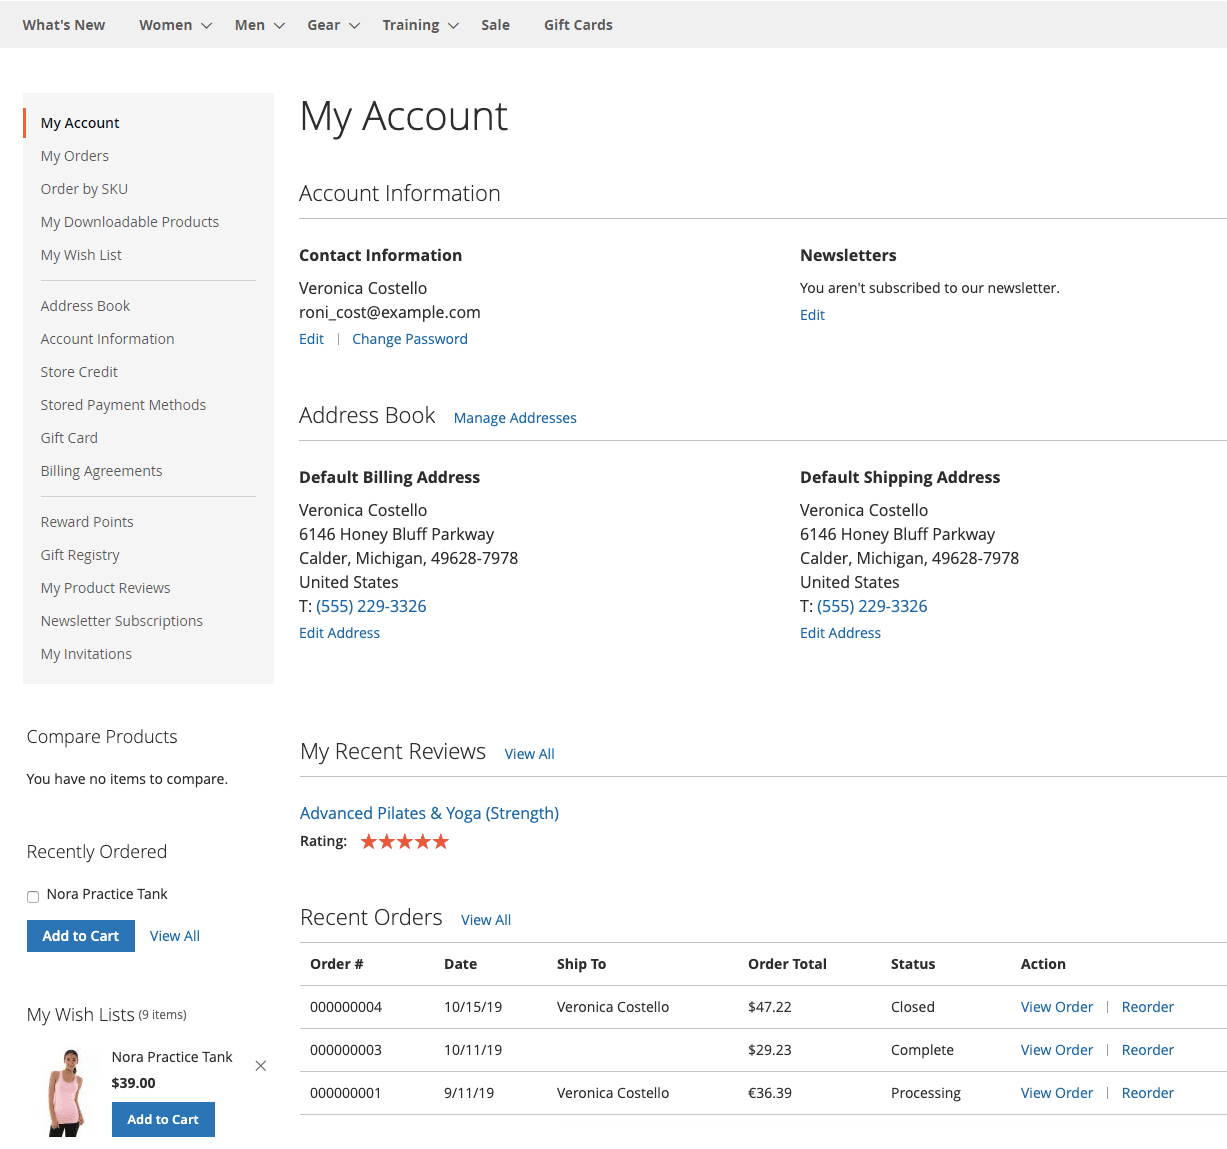
Customers manage their accounts through the My Account link, where they’ll view and modify information like addresses, preferences, subscriptions, and wishlists.
Sales, shipping, and payment tutorials
Magento provides merchants with many resources to streamline sales, shipping, and payment. Developers can extend those features or integrate standalone options.
Manage sales in Magento
Magento permits you to manage all of your sales operations within the admin area, including:
- Quotes
- Orders
- Invoices
- Shipments
- Returns
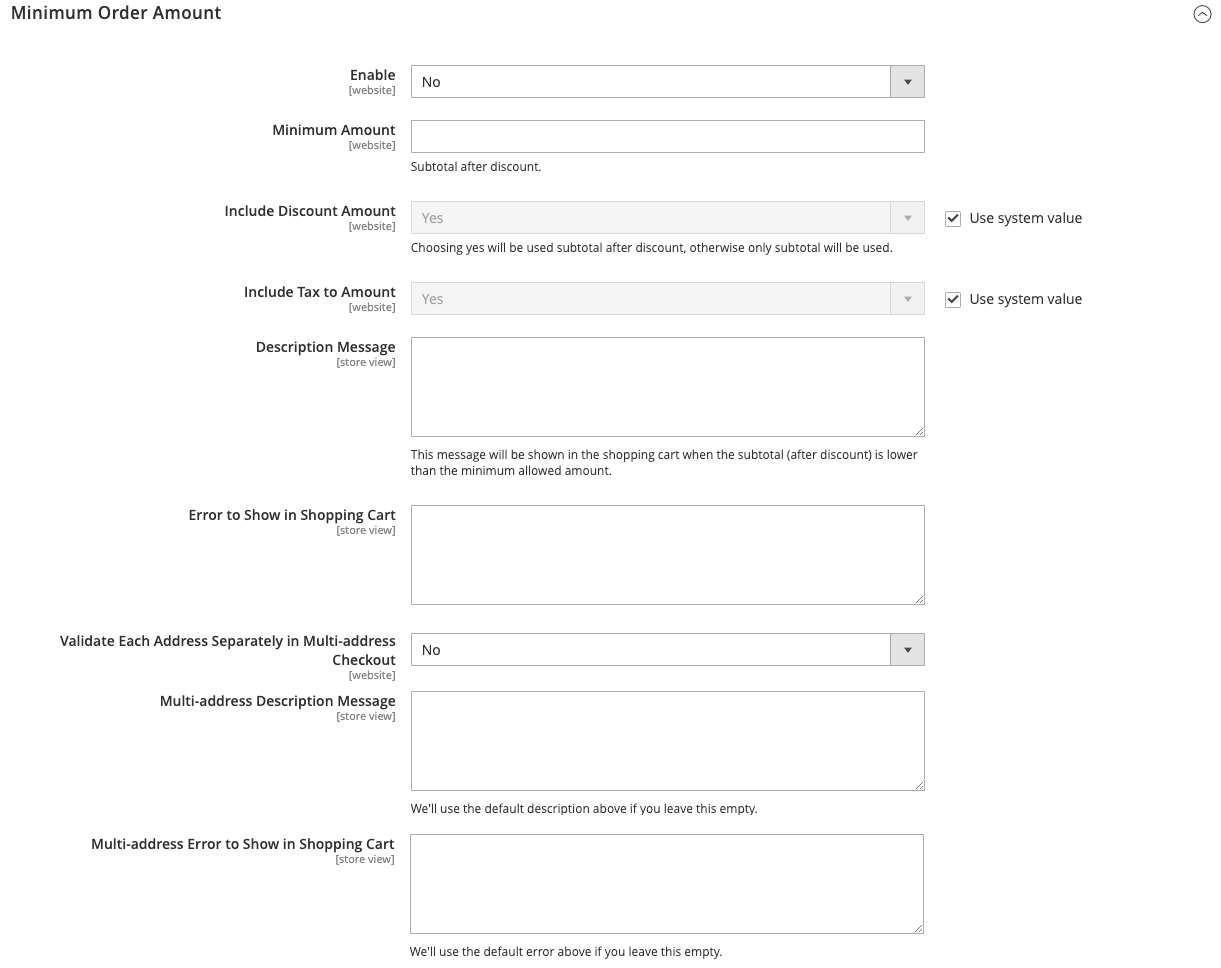
To determine how your sales operations work, navigate to Stores > Settings > Configuration. Let’s have a look at some common functions:
Set a minimum order amount by filling out the next form.
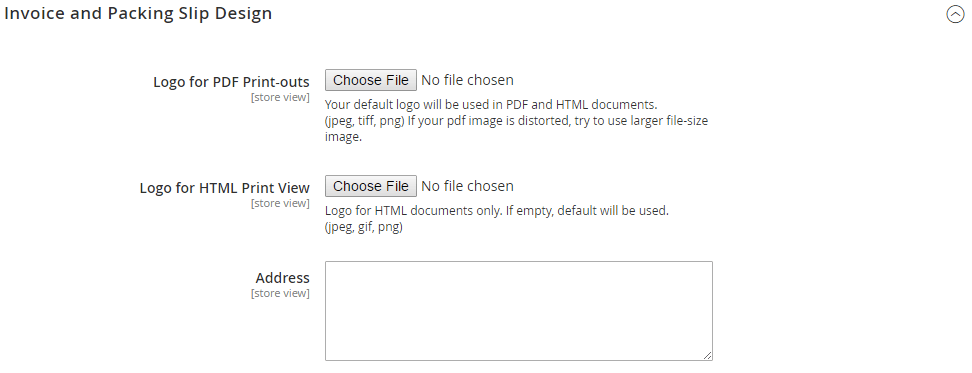
There’s one other form to establish your invoicing and packing slip design.
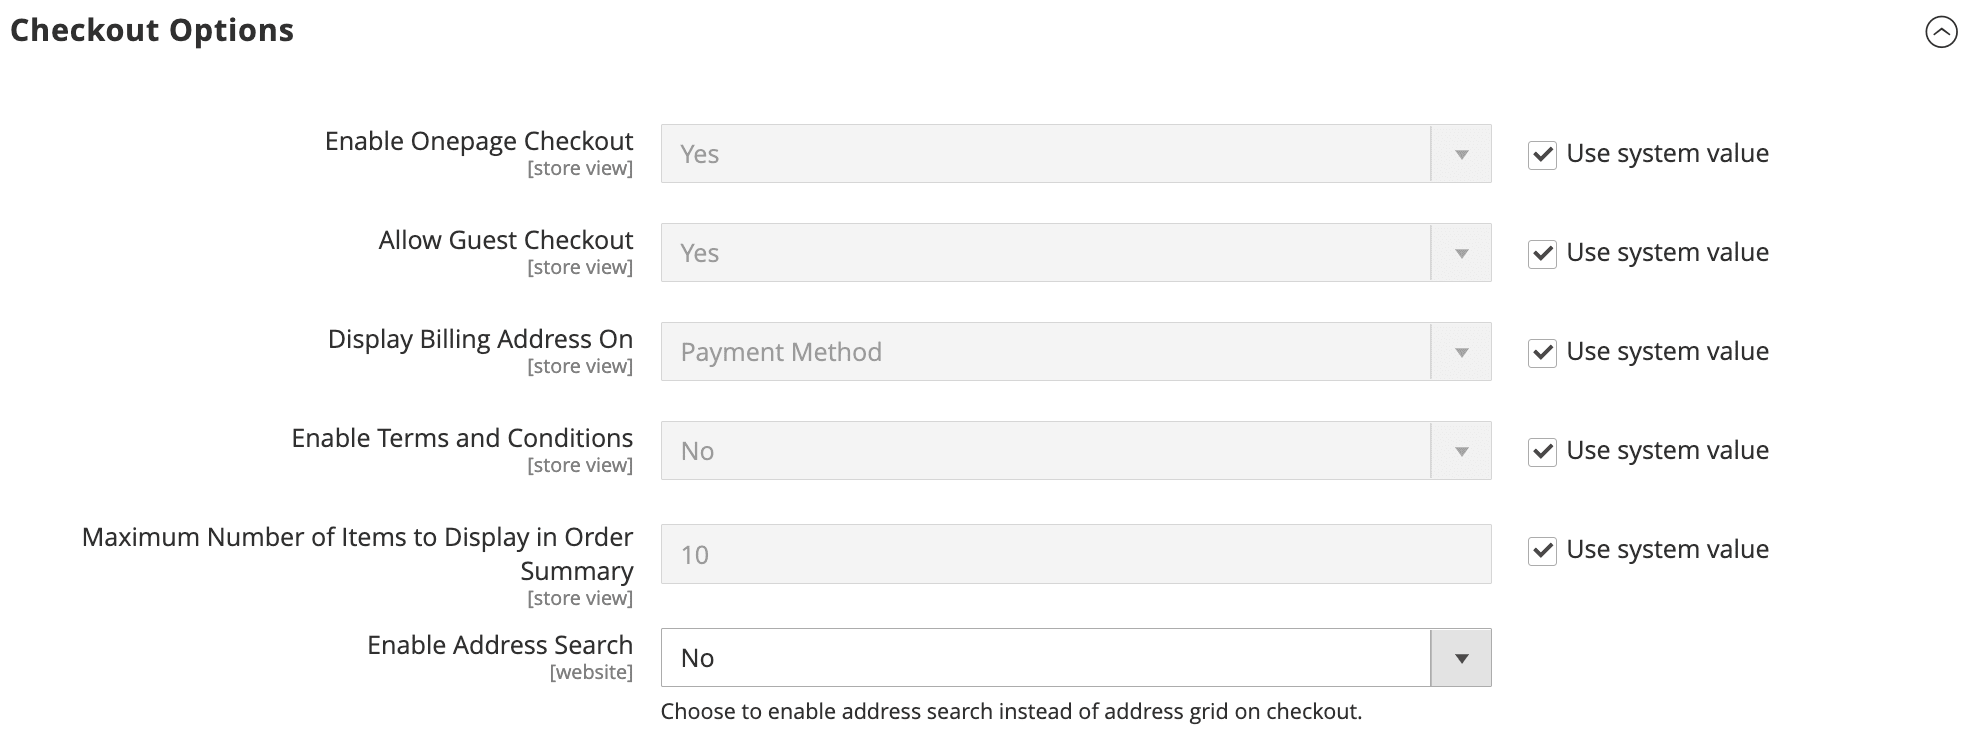
Throughout the checkout options section, configure how your shopping carts work and set an email template for when payments fail.
Magento permits you to manage tax classes, calculations, and displays.

Regarding sales, you possibly can configure the channels, reports, and emails. Nonetheless, note that sales quotes are exclusive to Adobe Commerce, but Magento Open Source users can replicate the feature with an extension.
Moreover, you’ll see options for pricing.
Manage cart and catalog price rules in Magento
As a store owner, you need to use conditions to discount items robotically. Cart price rules apply to items within the shopping cart, while catalog price rules apply to product listings. This Magento tutorial will walk you thru each.
To begin, go to Marketing > Promotions > Cart Price Rules.
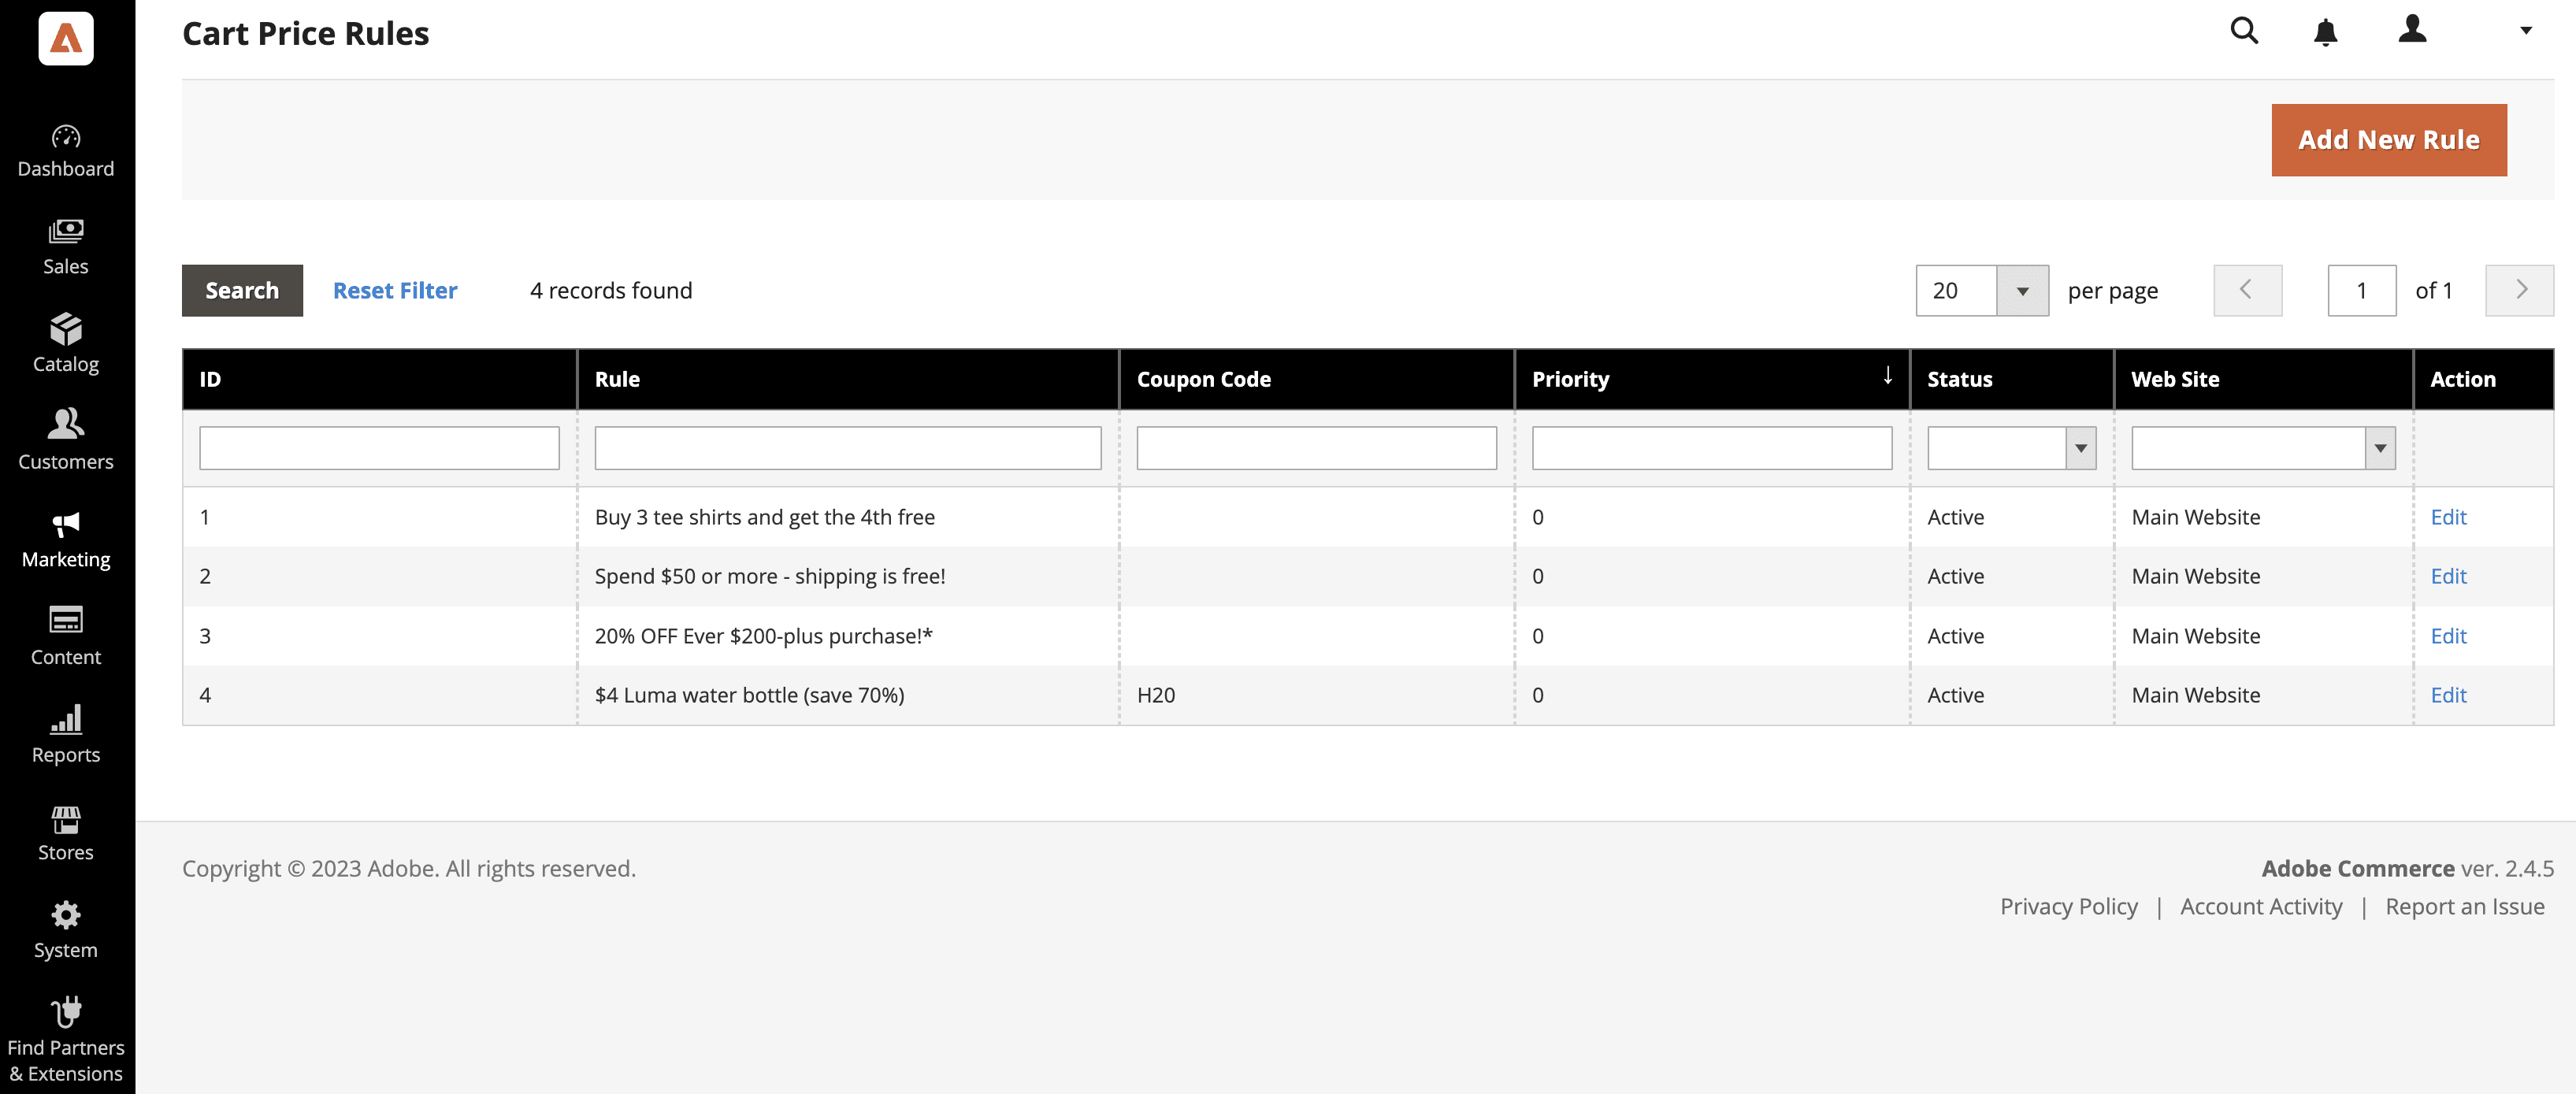
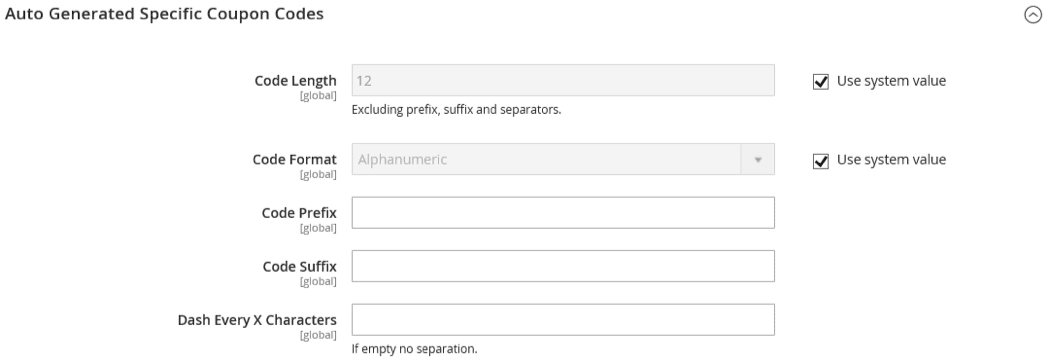
Cart discounts will be fully automatic or require valid coupon codes. To establish coupon codes, head to the admin sidebar and visit Stores > Settings > Configuration.
How about catalog price rules? Find those settings in Marketing > Promotions > Catalog Price Rules.
Catalog price discounts are only available for products that meet your set conditions.
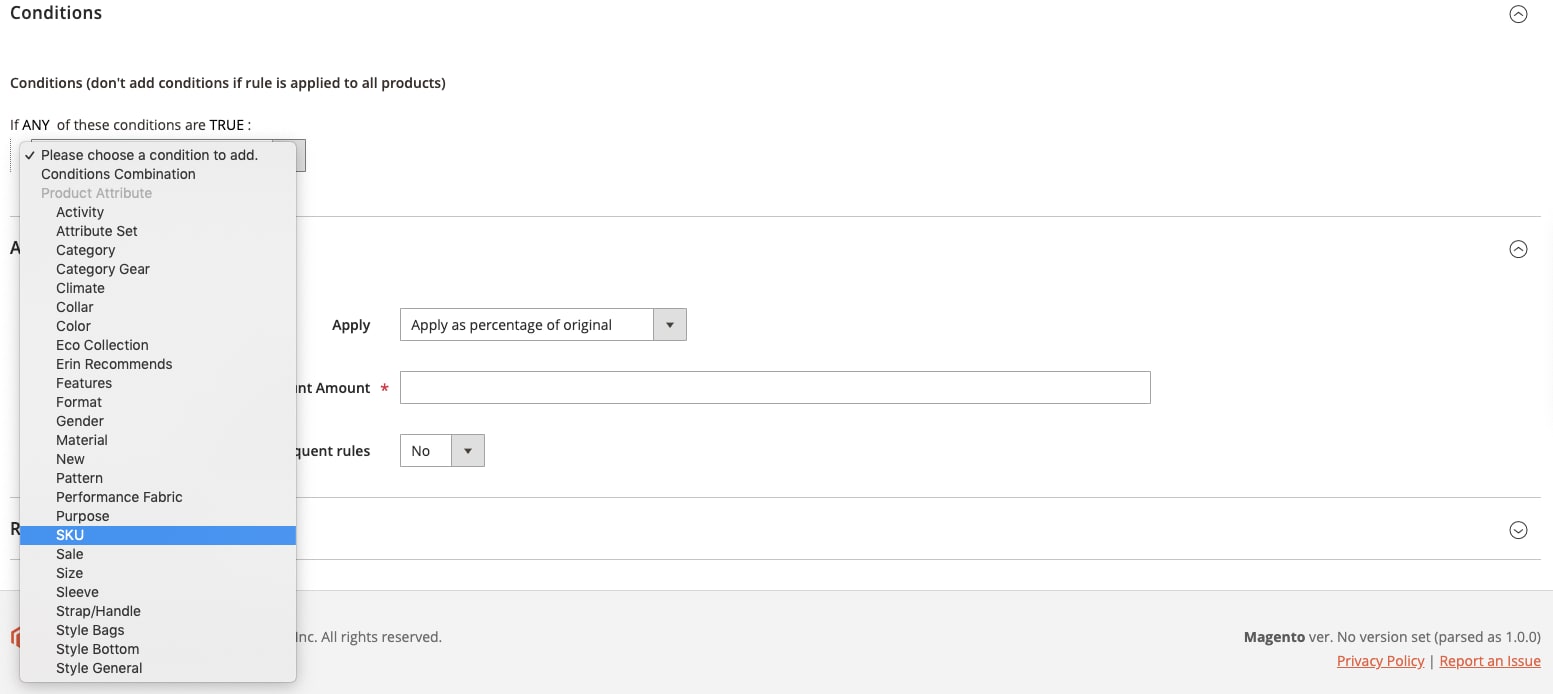
You may further control which SKUs are eligible for discounts and the way much you discount them.
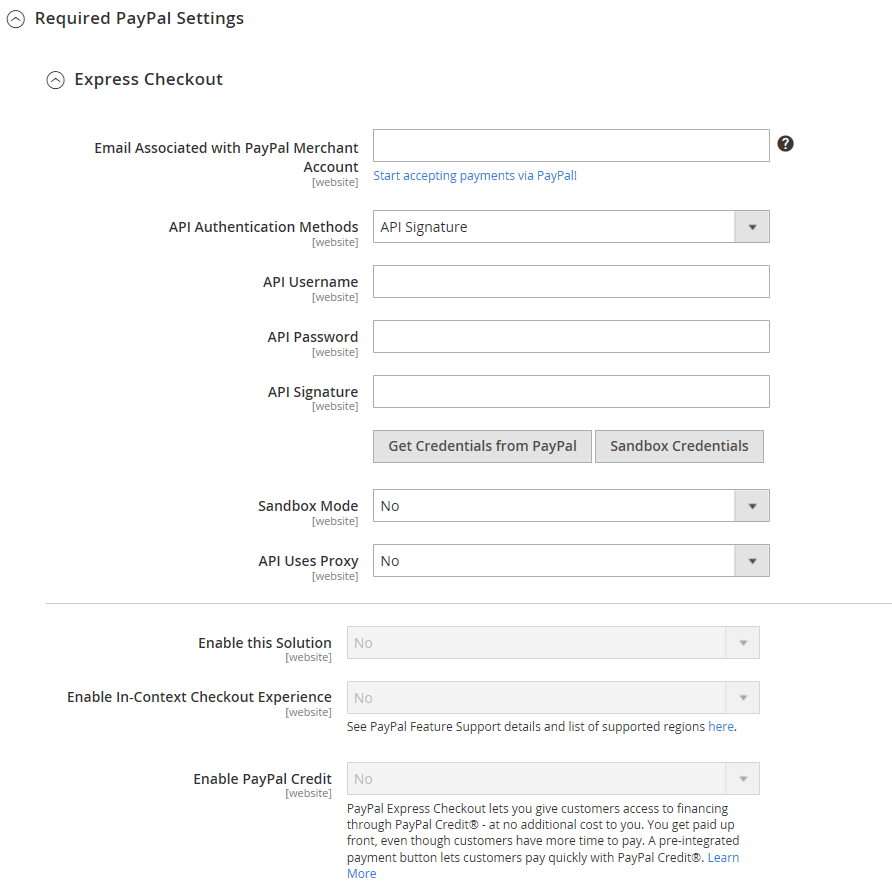
Manage payments in Magento
Magento supports multiple payment methods, and you need to use integrations to enable whichever payment methods you would like. Here’s the setup for 2 popular solutions, PayPal and Braintree.
Head to Stores > Settings > Configuration. You’ll see a bit to establish Paypal Express Checkout.
You’ll also see Braintree settings. Braintree supports ACH, Venmo, Apple Pay, Google Pay, and bank card payment processing.

Using extensions, you possibly can enable money orders, bank transfers, money on delivery, and even offline payment management for checks.
Manage shipping in Magento
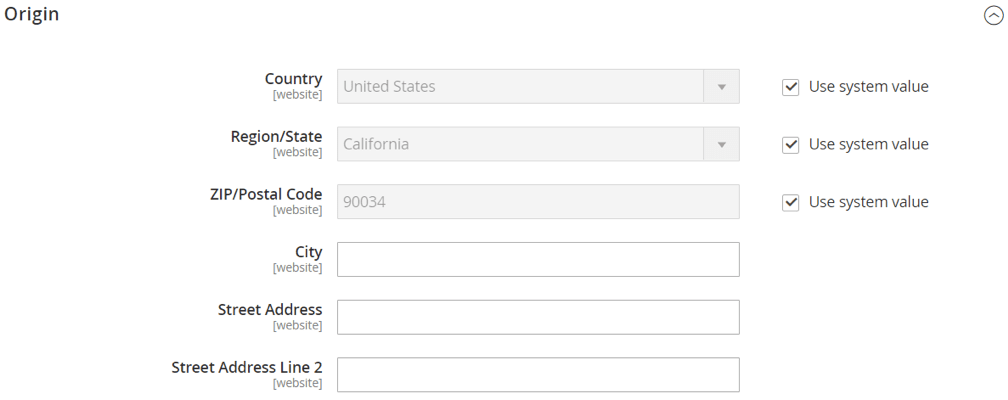
Your shipping setup determines where shipments start, your policy, and the handling of multiple addresses. Head to the shipping settings in Stores > Settings > Configuration.
Setting your shipping origin is simple: Just fill out the next form.
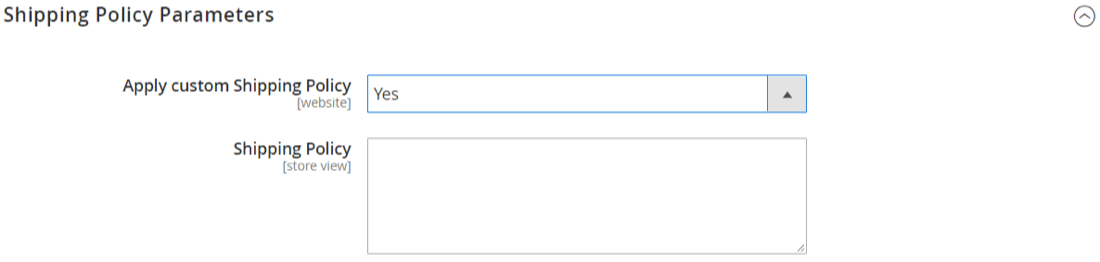
Define your shipping policy parameters by describing them within the corresponding box.
To permit shipping to multiple addresses, find the next drop-down menu and set it to yes.

As a merchant, you possibly can boost your conversion rate by offering multiple shipping methods. Consider organising your Magento store to supply table rate shipping, free shipping, and curbside pickup.
For delivery, you possibly can integrate and configure couriers, including UPS, USPS, DHL, and FedEx.
Adobe Commerce users can access all of Magento’s marketing features by default. Magento Open Source users should use extensions so as to add features like gift registries and loyalty programs.
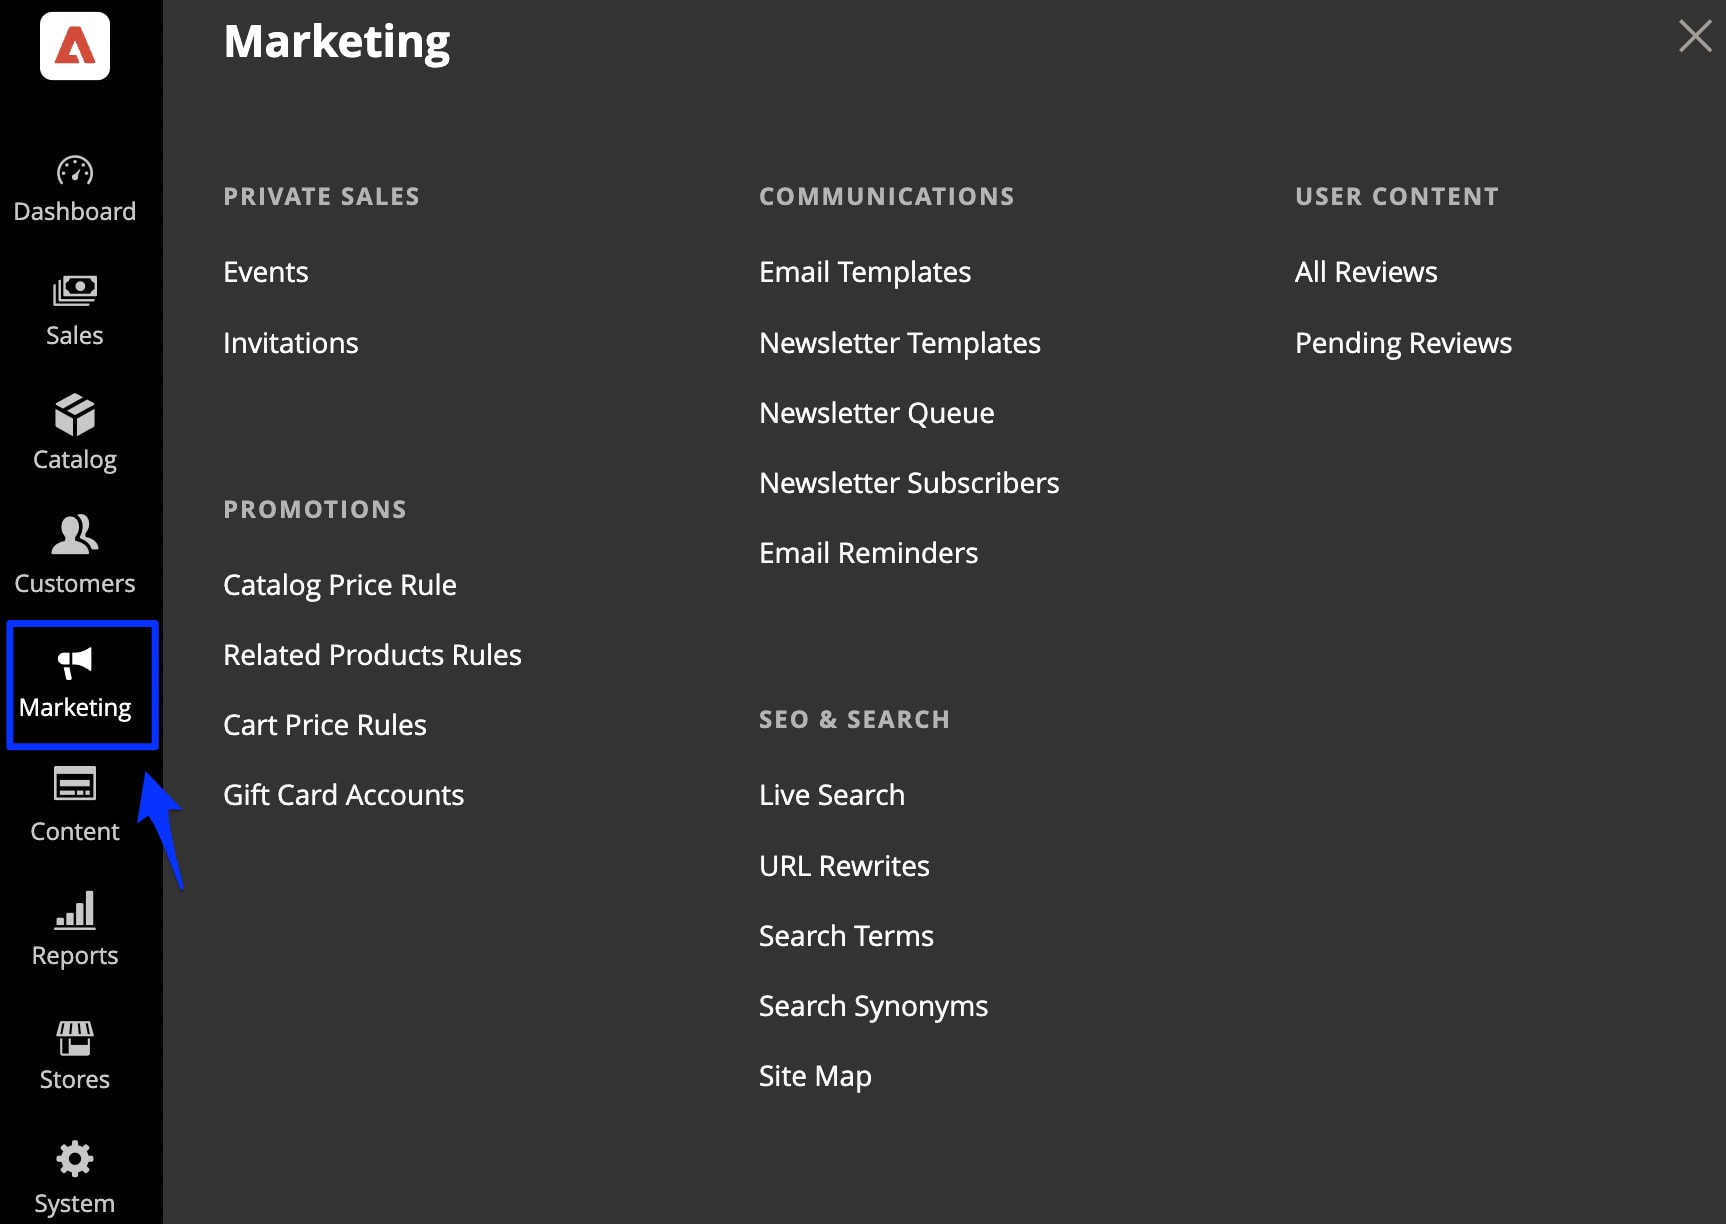
Adobe Commerce and Magento Open Source users can manage probably the most common marketing tools like promotion, newsletters, user-generated content, and search engine optimization. To accomplish that, find the marketing tab on the admin sidebar.
Use the next form to enable product reviews from registrants and guests.

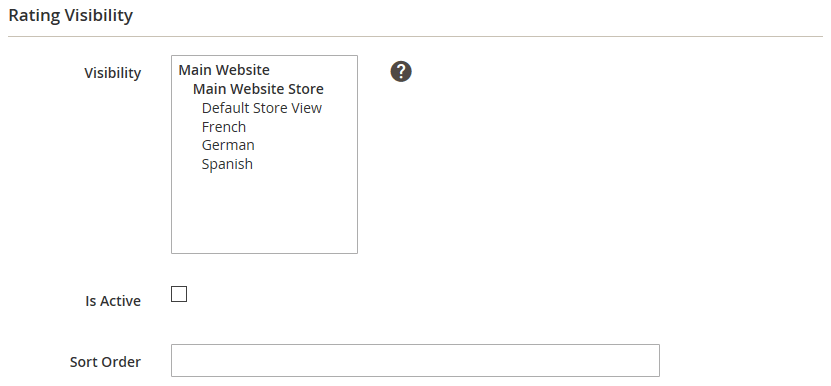
You can too control how product rankings appear in your Magento website. Configure the rating visibility section.
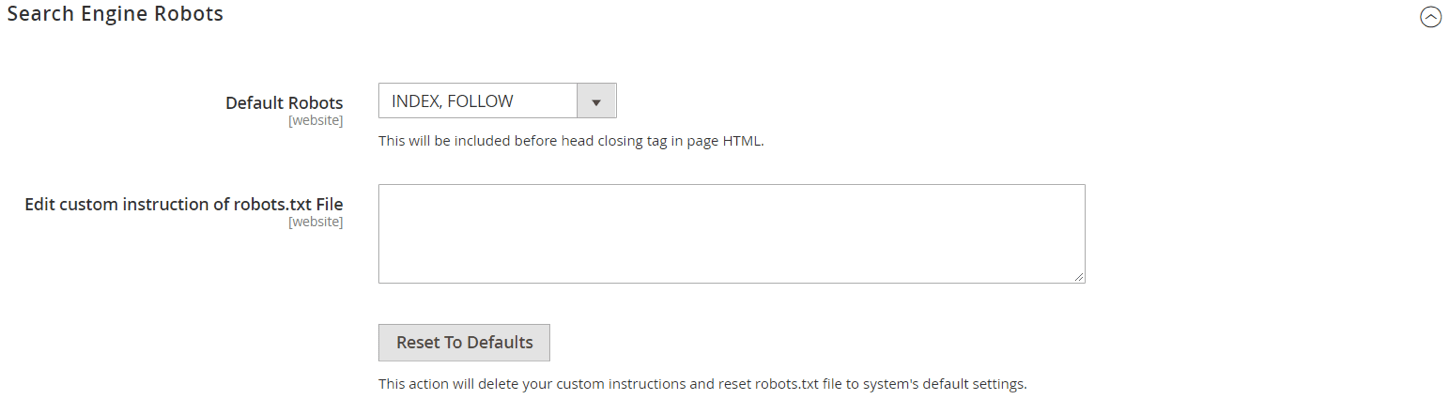
Magento supports your SEO efforts. Start by visiting the search engine robots section, then add your metadata, sitemaps, and URL redirects for products, pages, and categories.
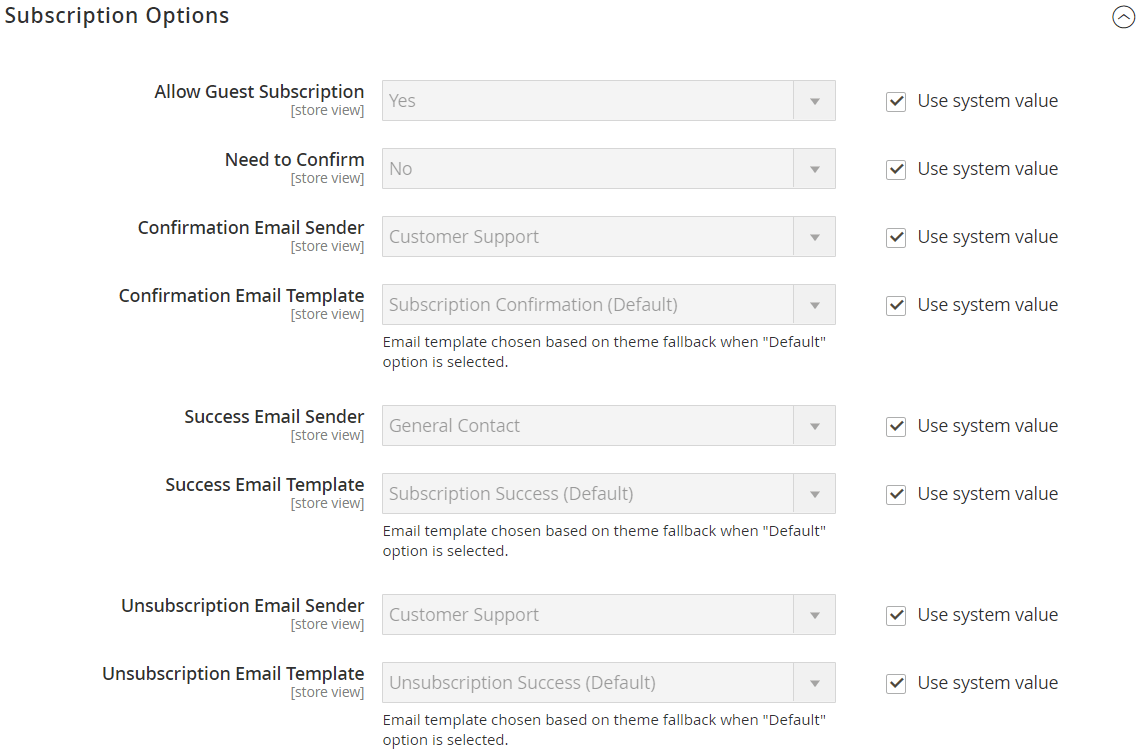
Go to the subscription options area to enable and alter newsletter subscriptions. You can too personalize email notifications sent by your store.
As much as you promote your website, you won’t make sales if users don’t feel secure buying from you. This Magento tutorial will explain the steps to adding security.
These Magento security measures will safeguard your online store.
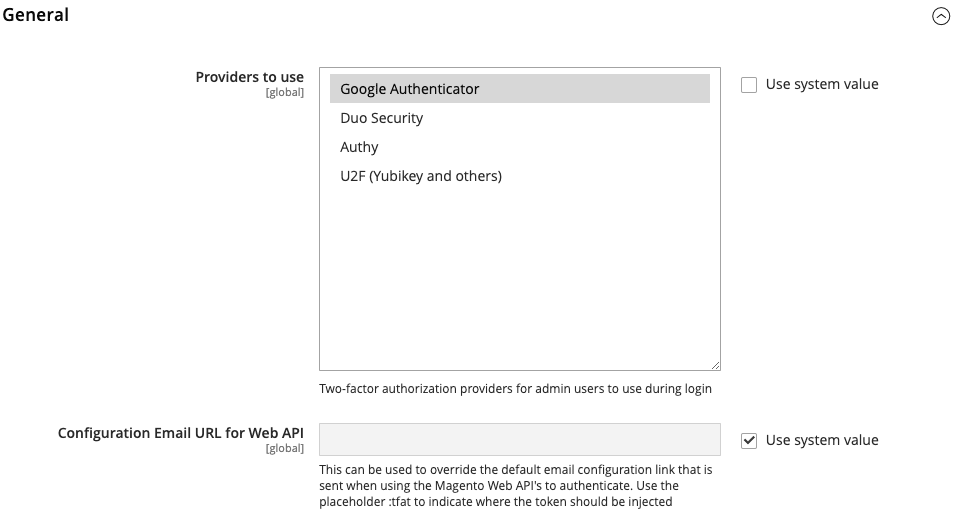
Two-factor authentication (2FA)
Magento supports two-factor authentication from 4 providers:
- Google Authenticator.
- Duo Security.
- Authy.
- U2F (like YubiKey, ePass, and Fido).
To choose your chosen solution, go to the admin sidebar, then Stores > Settings > Configuration. You’ll find the next form.
Stores using Adobe’s Identity Management Service (IMS) may have 2FA disabled. Admins logged in with Adobe credentials don’t require re-authentication for many tasks, as IMS will handle authentication inside the session.
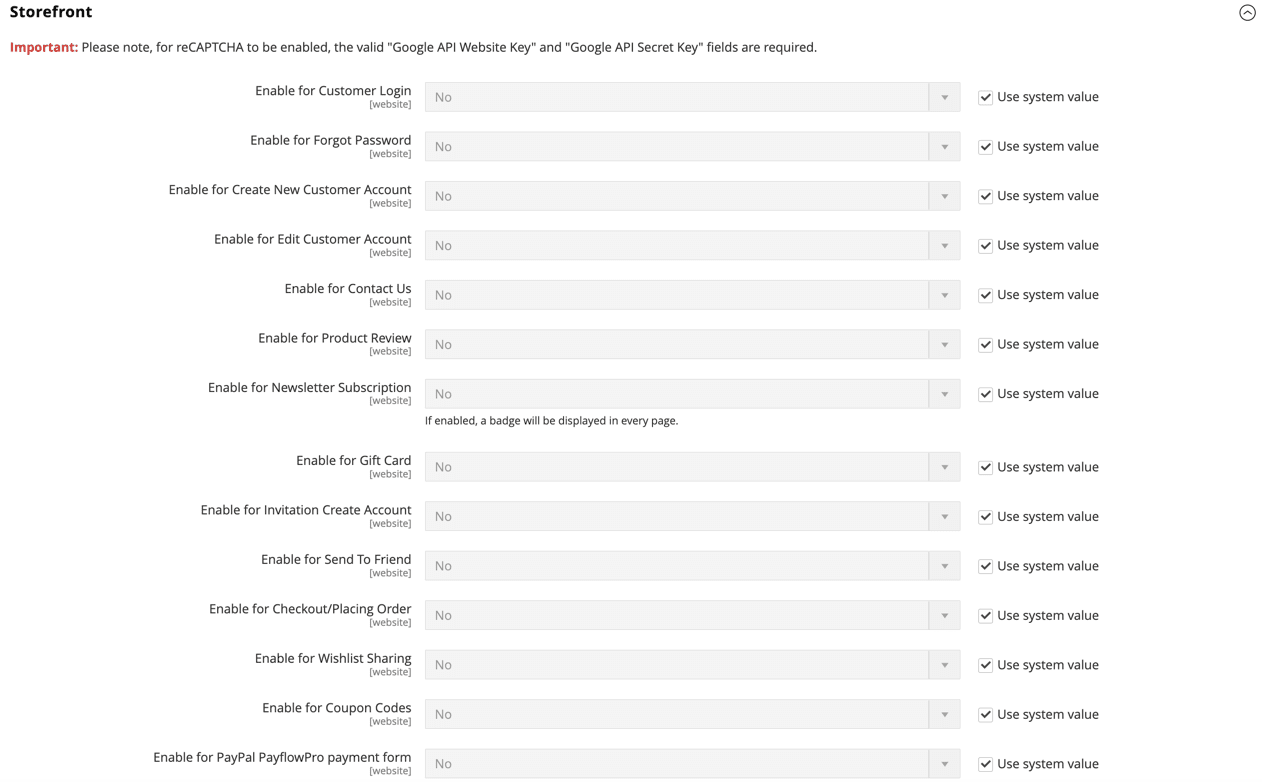
Google reCAPTCHA
Google reCAPTCHA distinguishes human and automatic website access, detecting fraud and blocking suspicious bots. Set this up in Stores > Settings > Configuration.
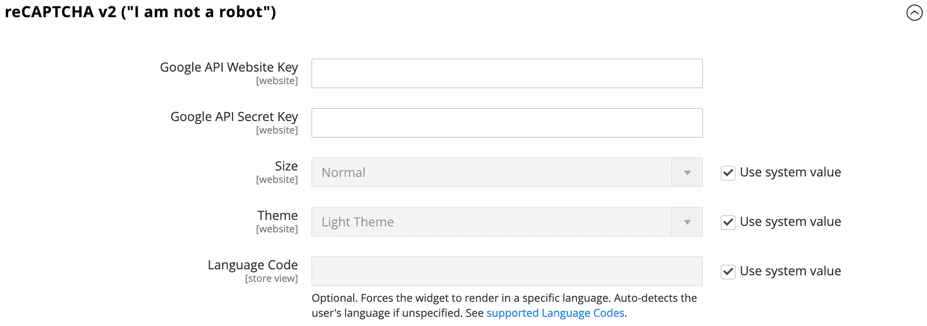
You should utilize a visual or invisible reCAPTCHA.
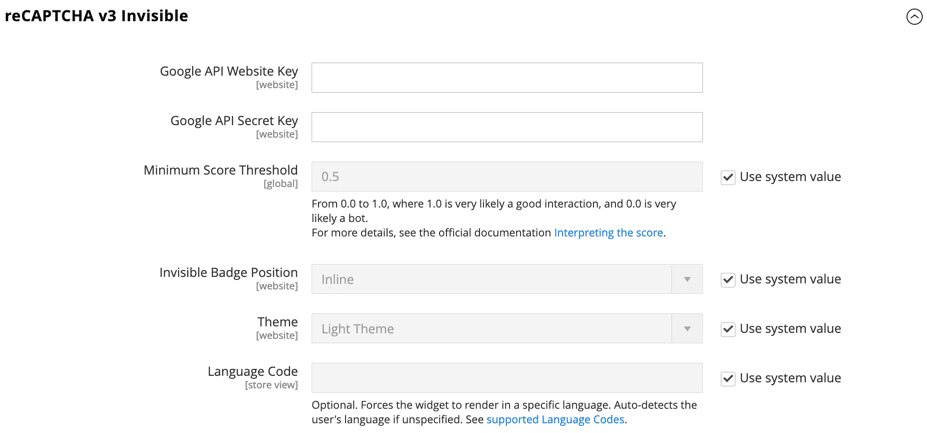
Notably, you possibly can turn reCAPTCHA on or off for scenarios where an admin user logs in or forgets their password.

Storefront reCAPTCHA includes more control options to handle security needs in several situations.
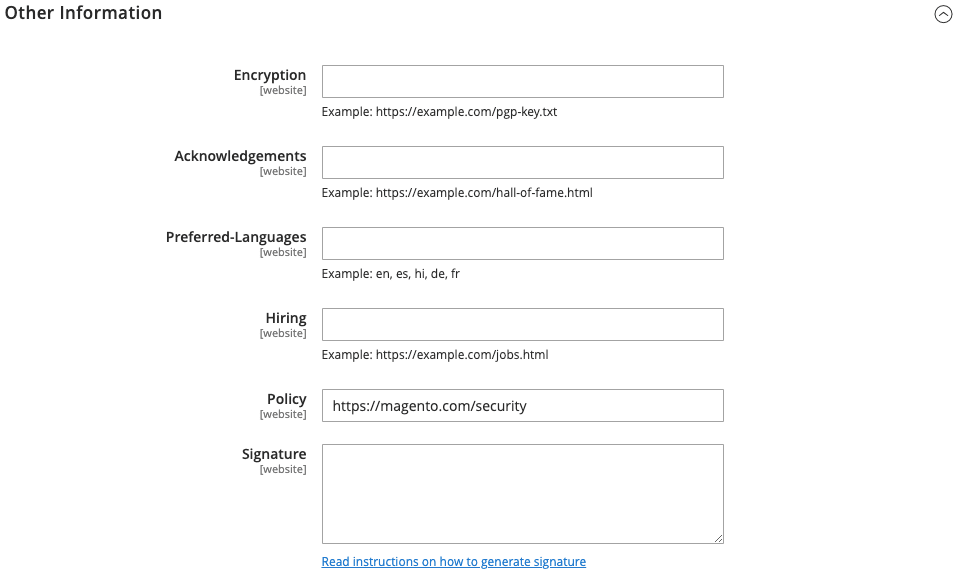
Security.txt
Enable the safety.txt file to get reports on potential vulnerabilities. From the admin sidebar, go to Stores > Settings > Configuration. You’ll find the next drop-down menu.

Next, enter your contact information within the corresponding fields.
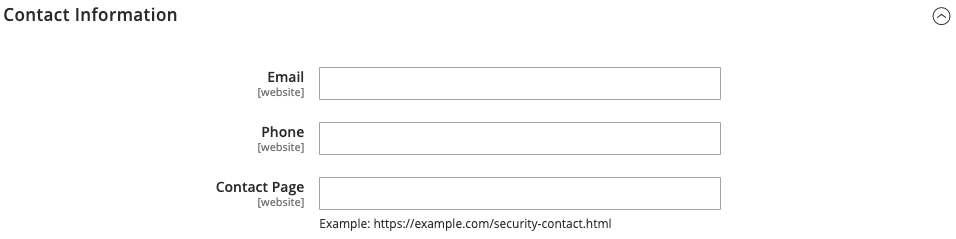
Provide as much info as possible, including your security policy, encryption, and digital signature.
With these security options enabled, your admin panel and storefront are more trustworthy.
If you happen to can handle page design, content, products, shipping, marketing, and security in Magento, you’re well in your option to launching your online store. The thing is, you don’t must stop at one store. Magento makes it easier to administer several stores without delay.
Making a multi-store in Magento
Magento’s multi-store capability means you possibly can manage several stores under a single Magento installation. Each store can have a novel design, plus unique products and settings.
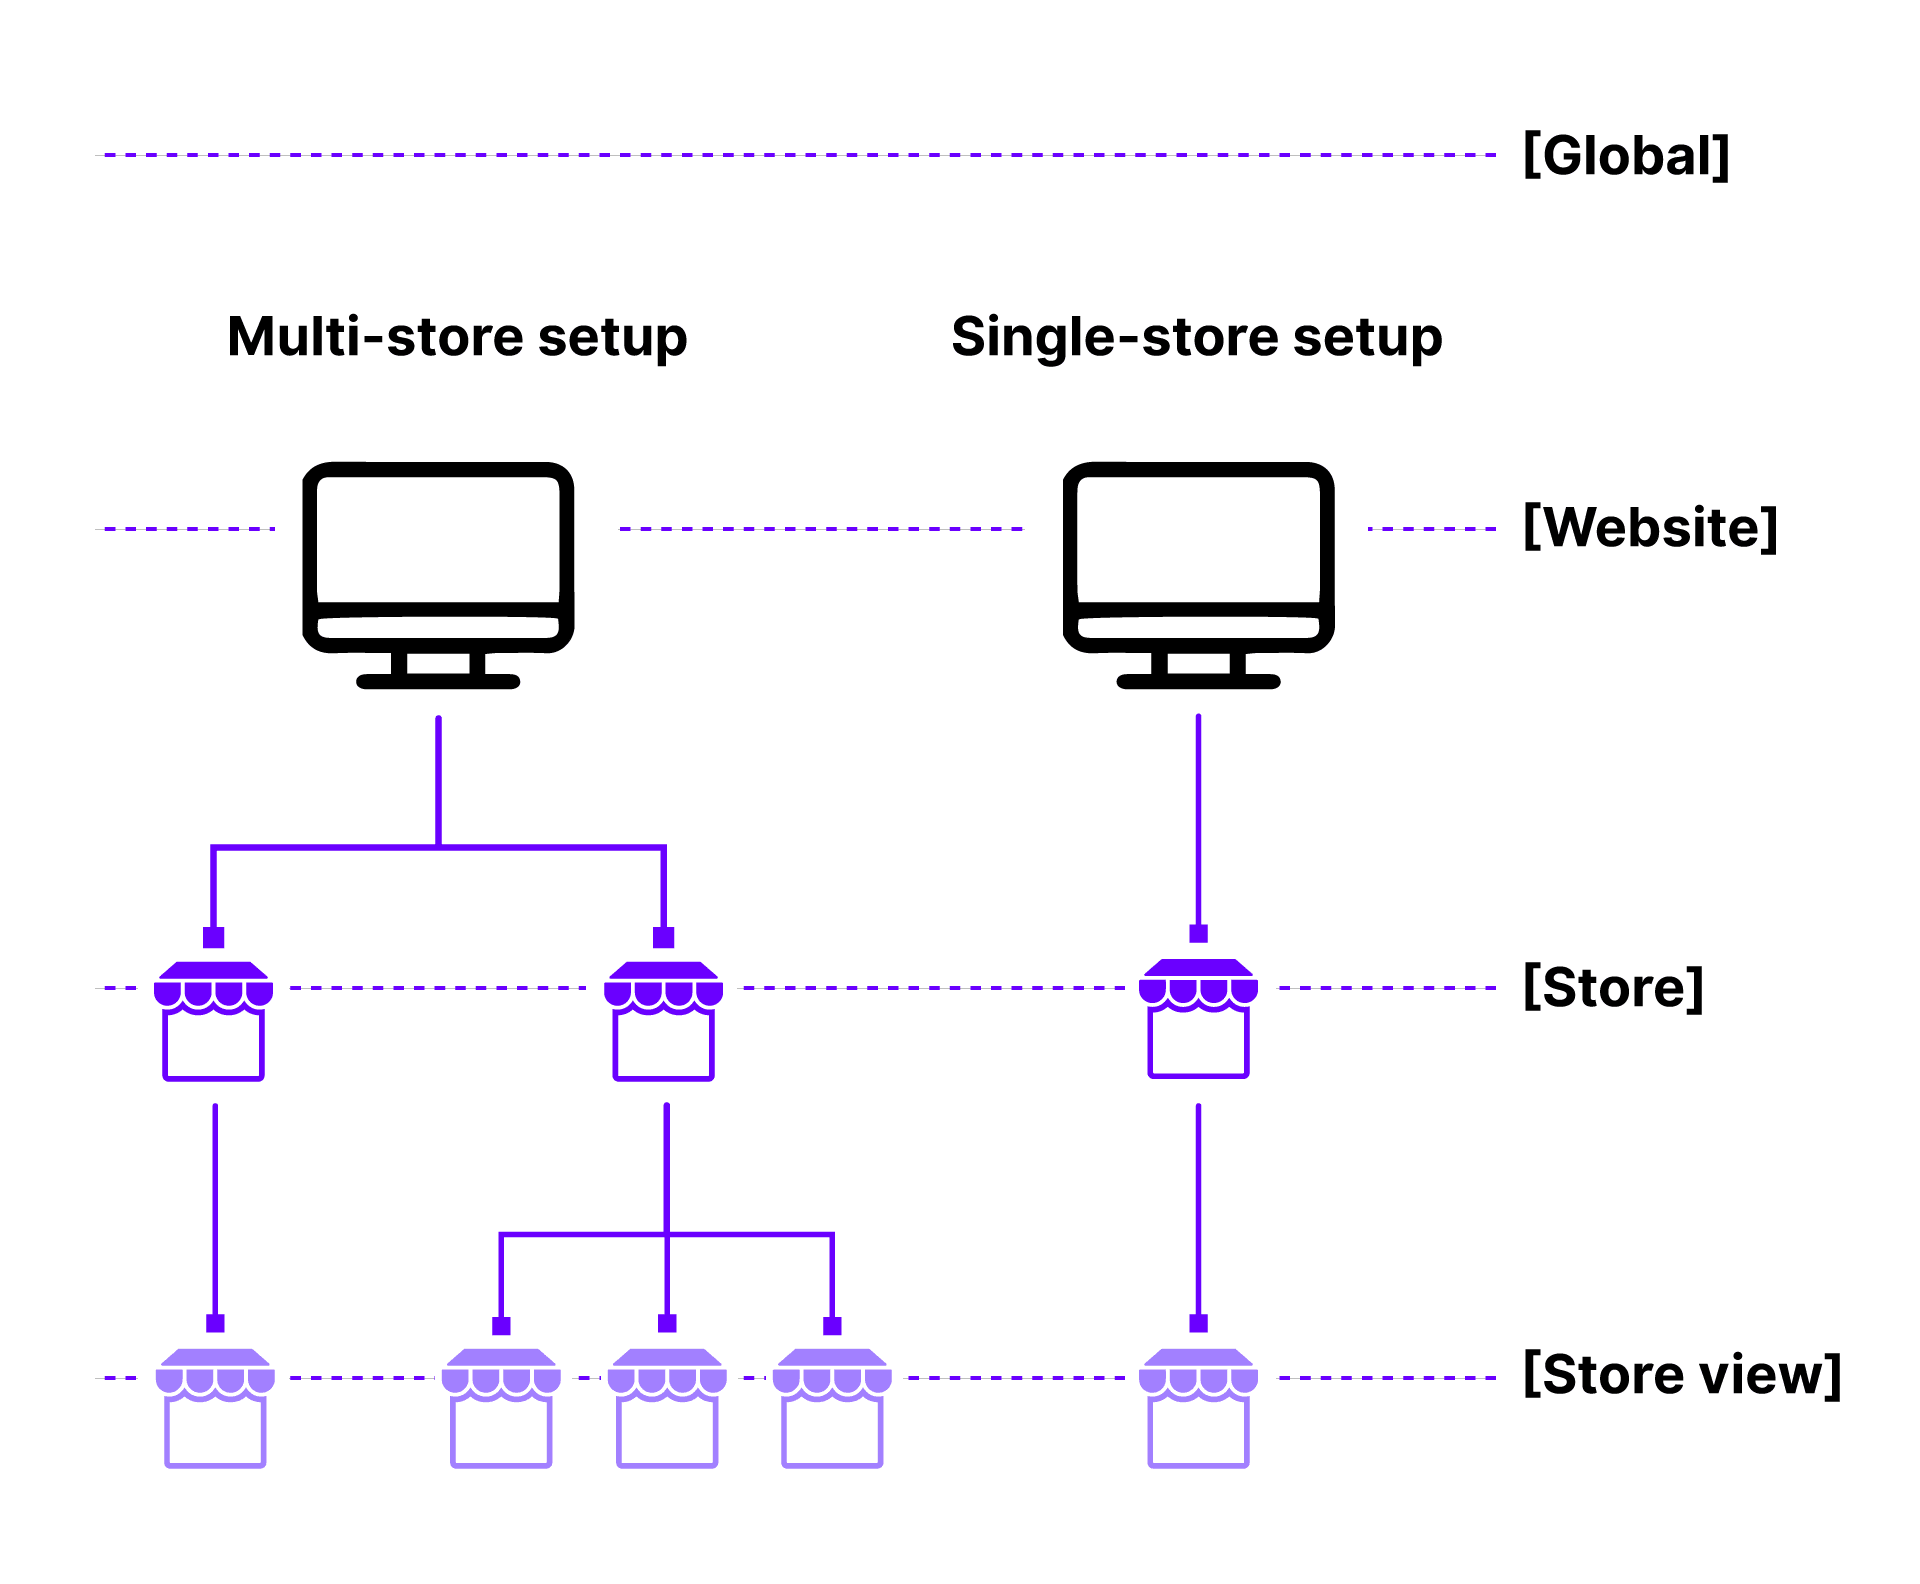
This empowers business owners to create visually appealing, personalized, and scalable online stores with Magento.
Final thoughts: Magento tutorial for beginners
While Magento initially appears daunting, you’ll find the infrastructure may be very adaptable. Now you recognize the way to create ecommerce experiences for B2B and B2C, due to this Magento tutorial. With practice, your store’s performance will increase.
Will you get probably the most out of Magento? Only for those who use it with a Magento-oriented hosting environment. Liquid Web offers full-stack activation, 24/7 expert support, and unlimited migrations, whether you go along with fully managed hosting or enterprise custom hosting.
